Reverse Engineer • Technician • iOS Tweak Developer • /T /F /E
A jailbreak tweak that brings iOS 18-style unit conversions to older iOS versions. Features custom UI, history, and category search via Theos and Objective-C.
Open-Source. Feel free to change and add to it as you wish or create a more polished tweak.
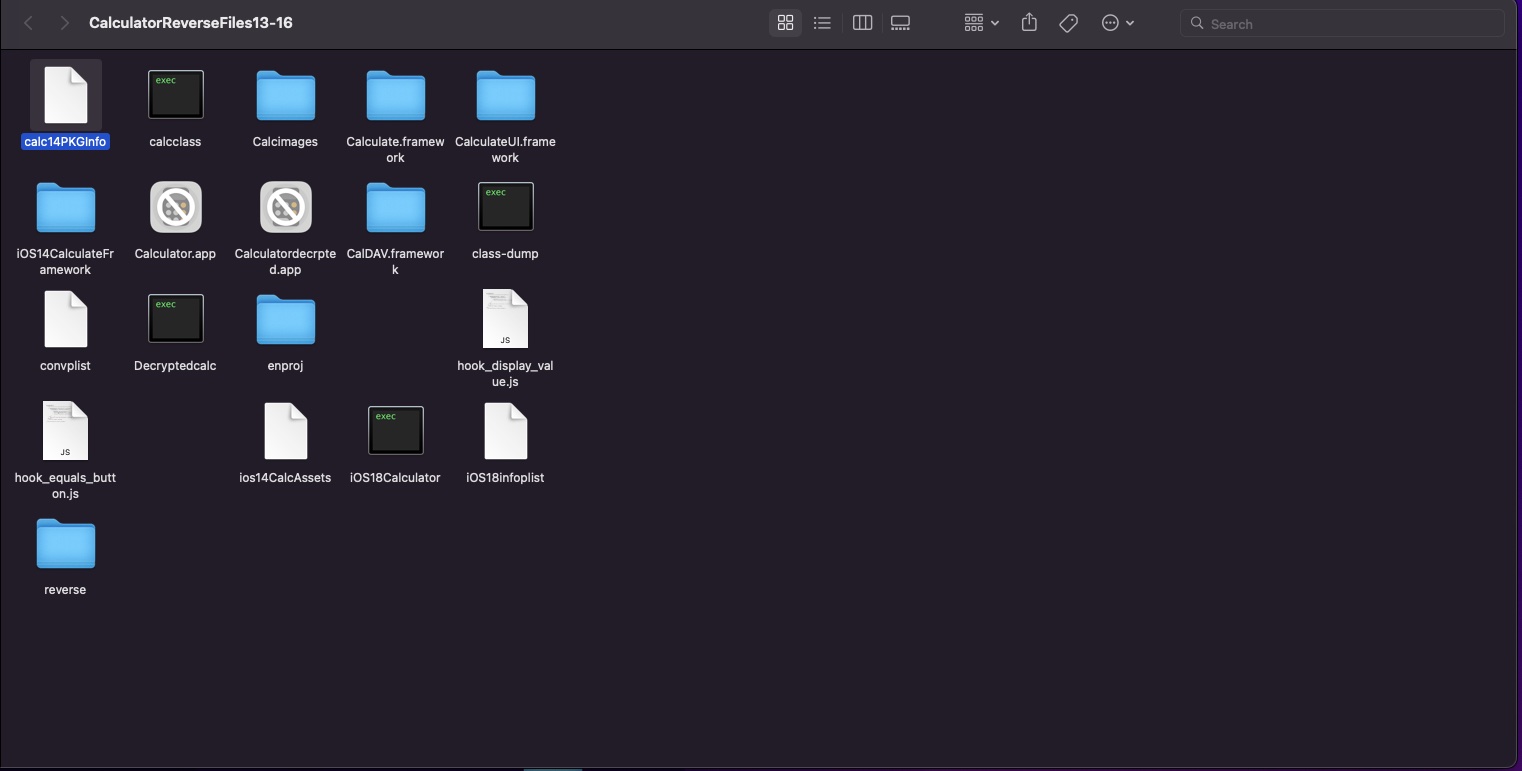
For tweak development and application analysis on iOS 18, I decrypted IPSWs using the BlackTop ipsw tool with AEA (AppleEncryptedArchive). This enabled me to access decrypted system applications like Calculator.app for reverse engineering and tweak injection testing.
hdiutil attach to expose the full root filesystem on macOS./System inside the mounted volume to retrieve system app bundles.Tools Used: ipsw (AEA Mode), hdiutil, Ghidra, Hopper, FLEX
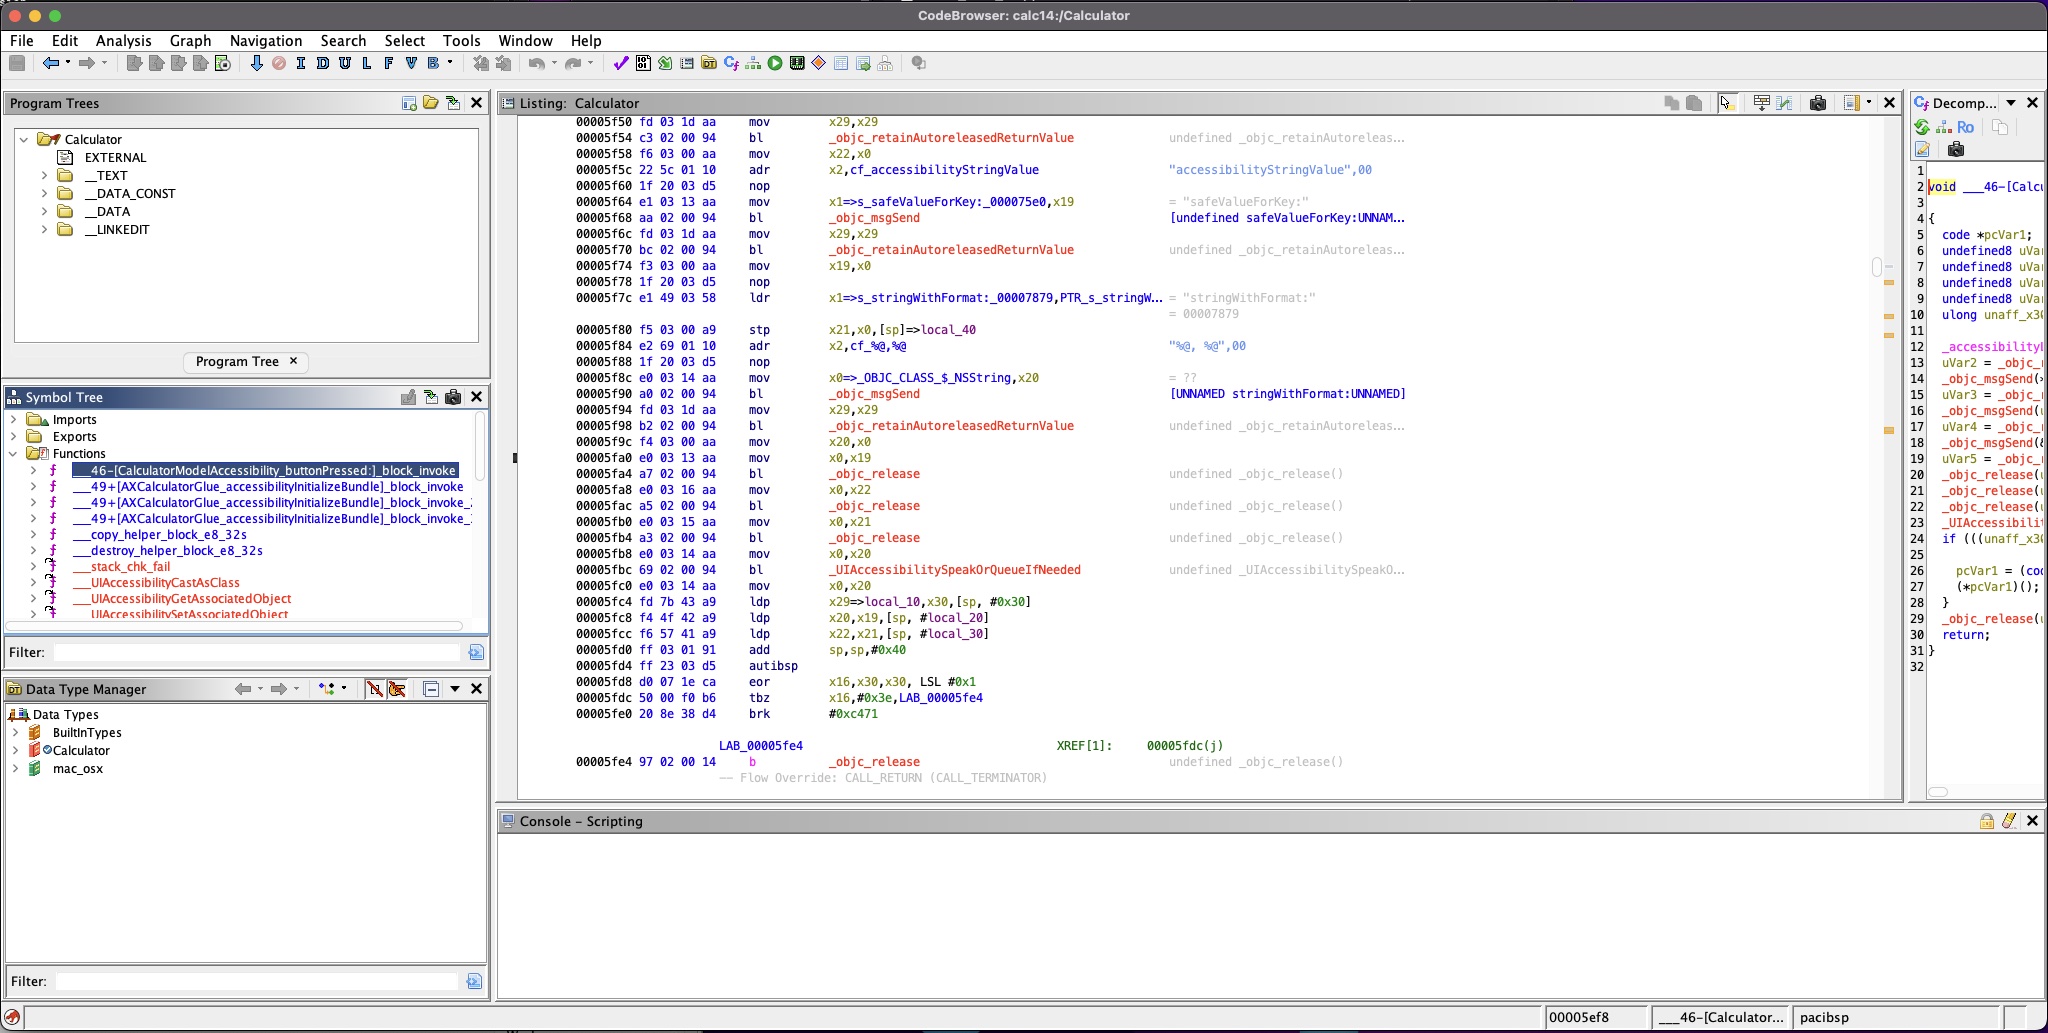
This write-up is a breakdown of my tweak's source code, including hook strategy, UI challenges, runtime value extraction, and how Apple's native iOS 18 behavior was reverse engineered and recreated.
This is a work in progress and the report will be updated as the tweak is.
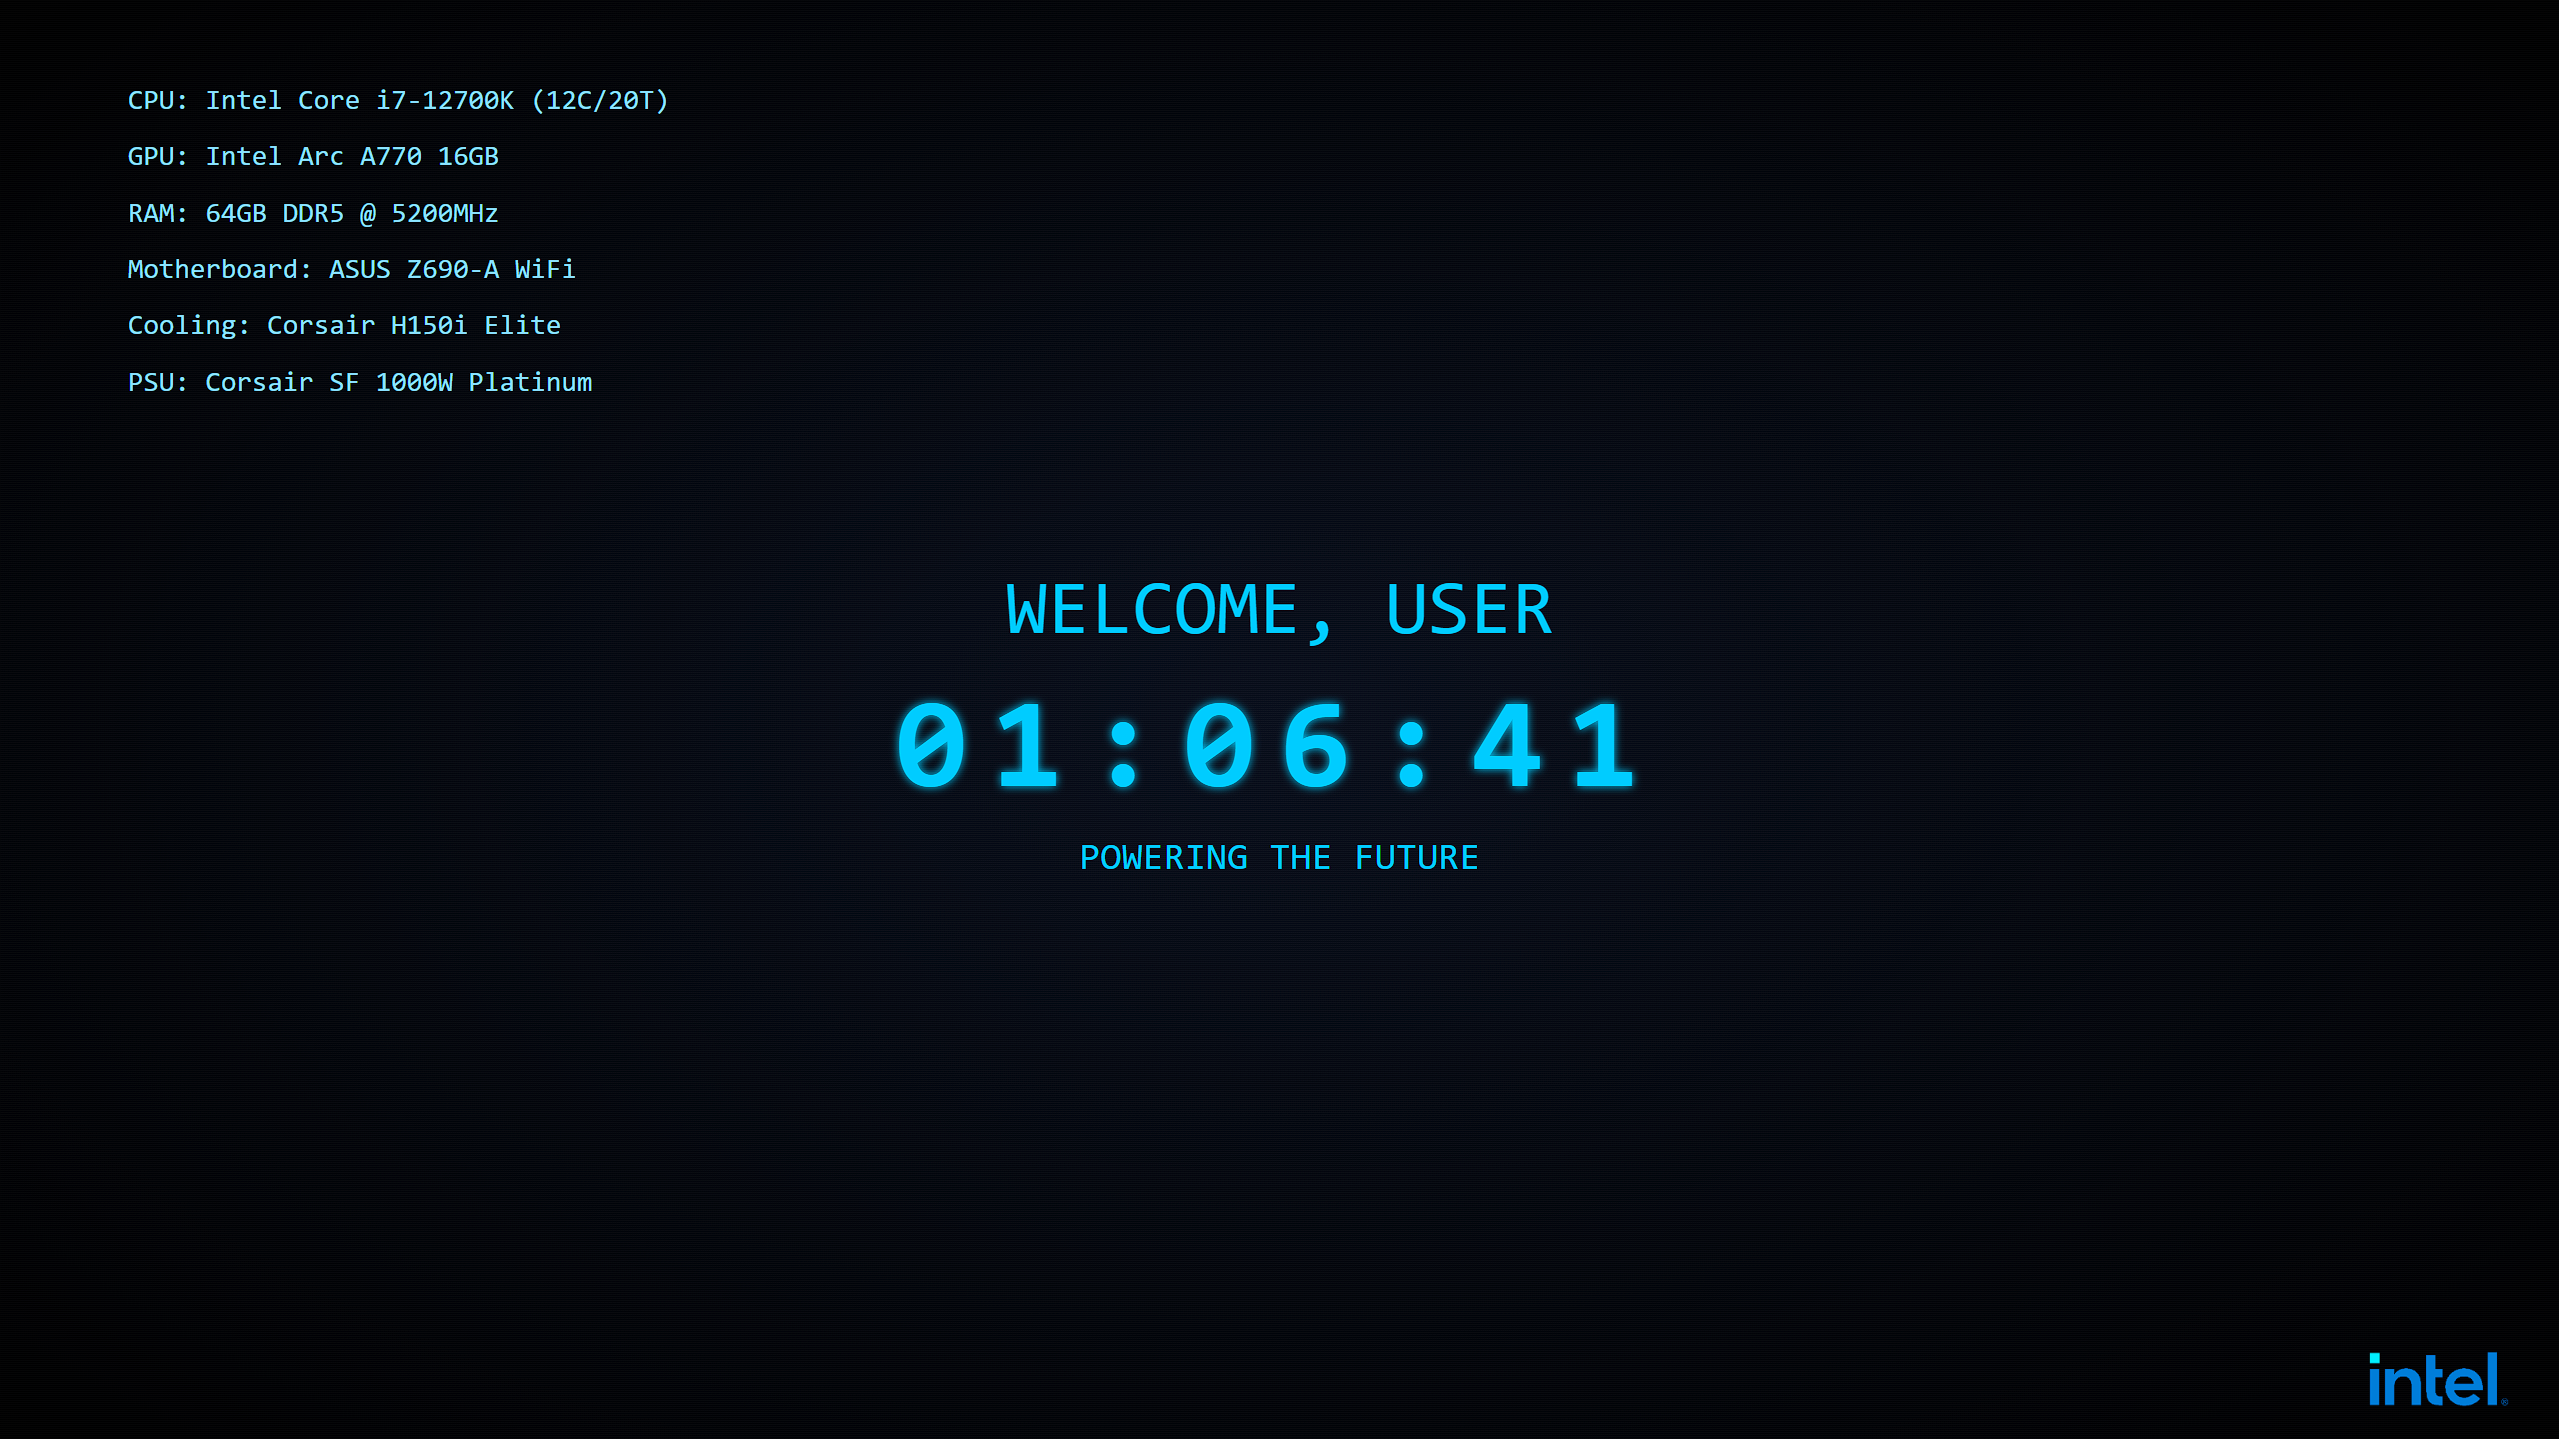
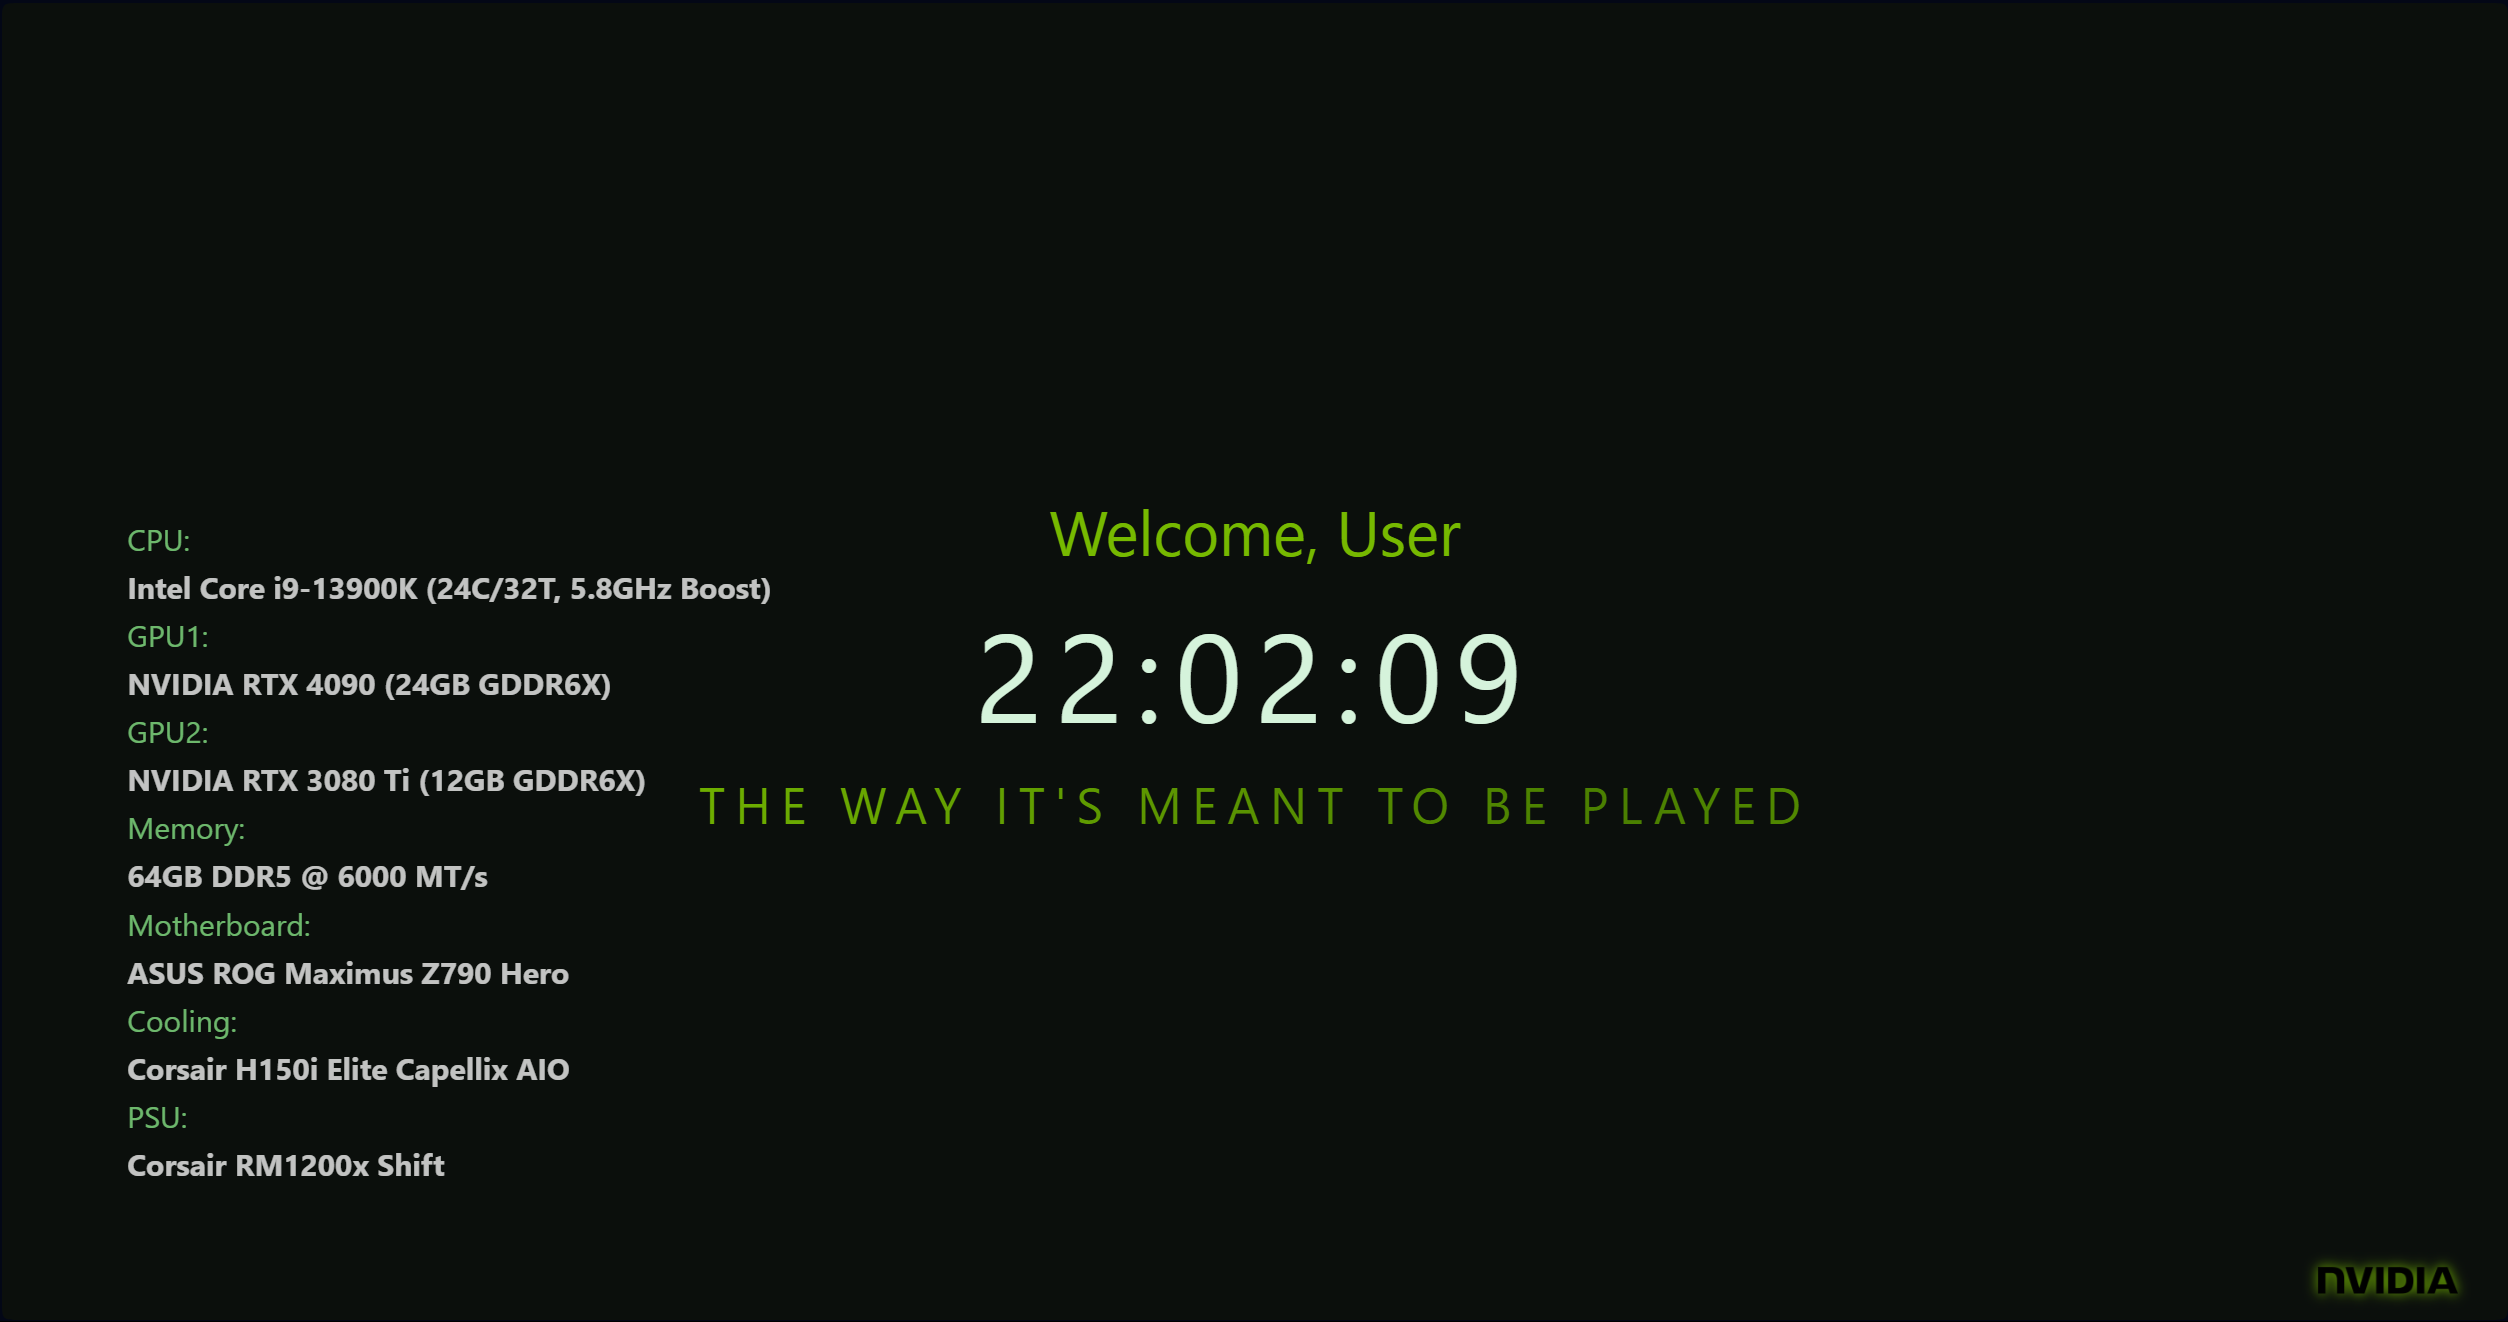
View Full Report (PDF)Hosted on Github, these animated wallpapers were created using HTML, CSS, and JavaScript. Each is designed for performance and style, intended to run via Lively Wallpaper with effects.


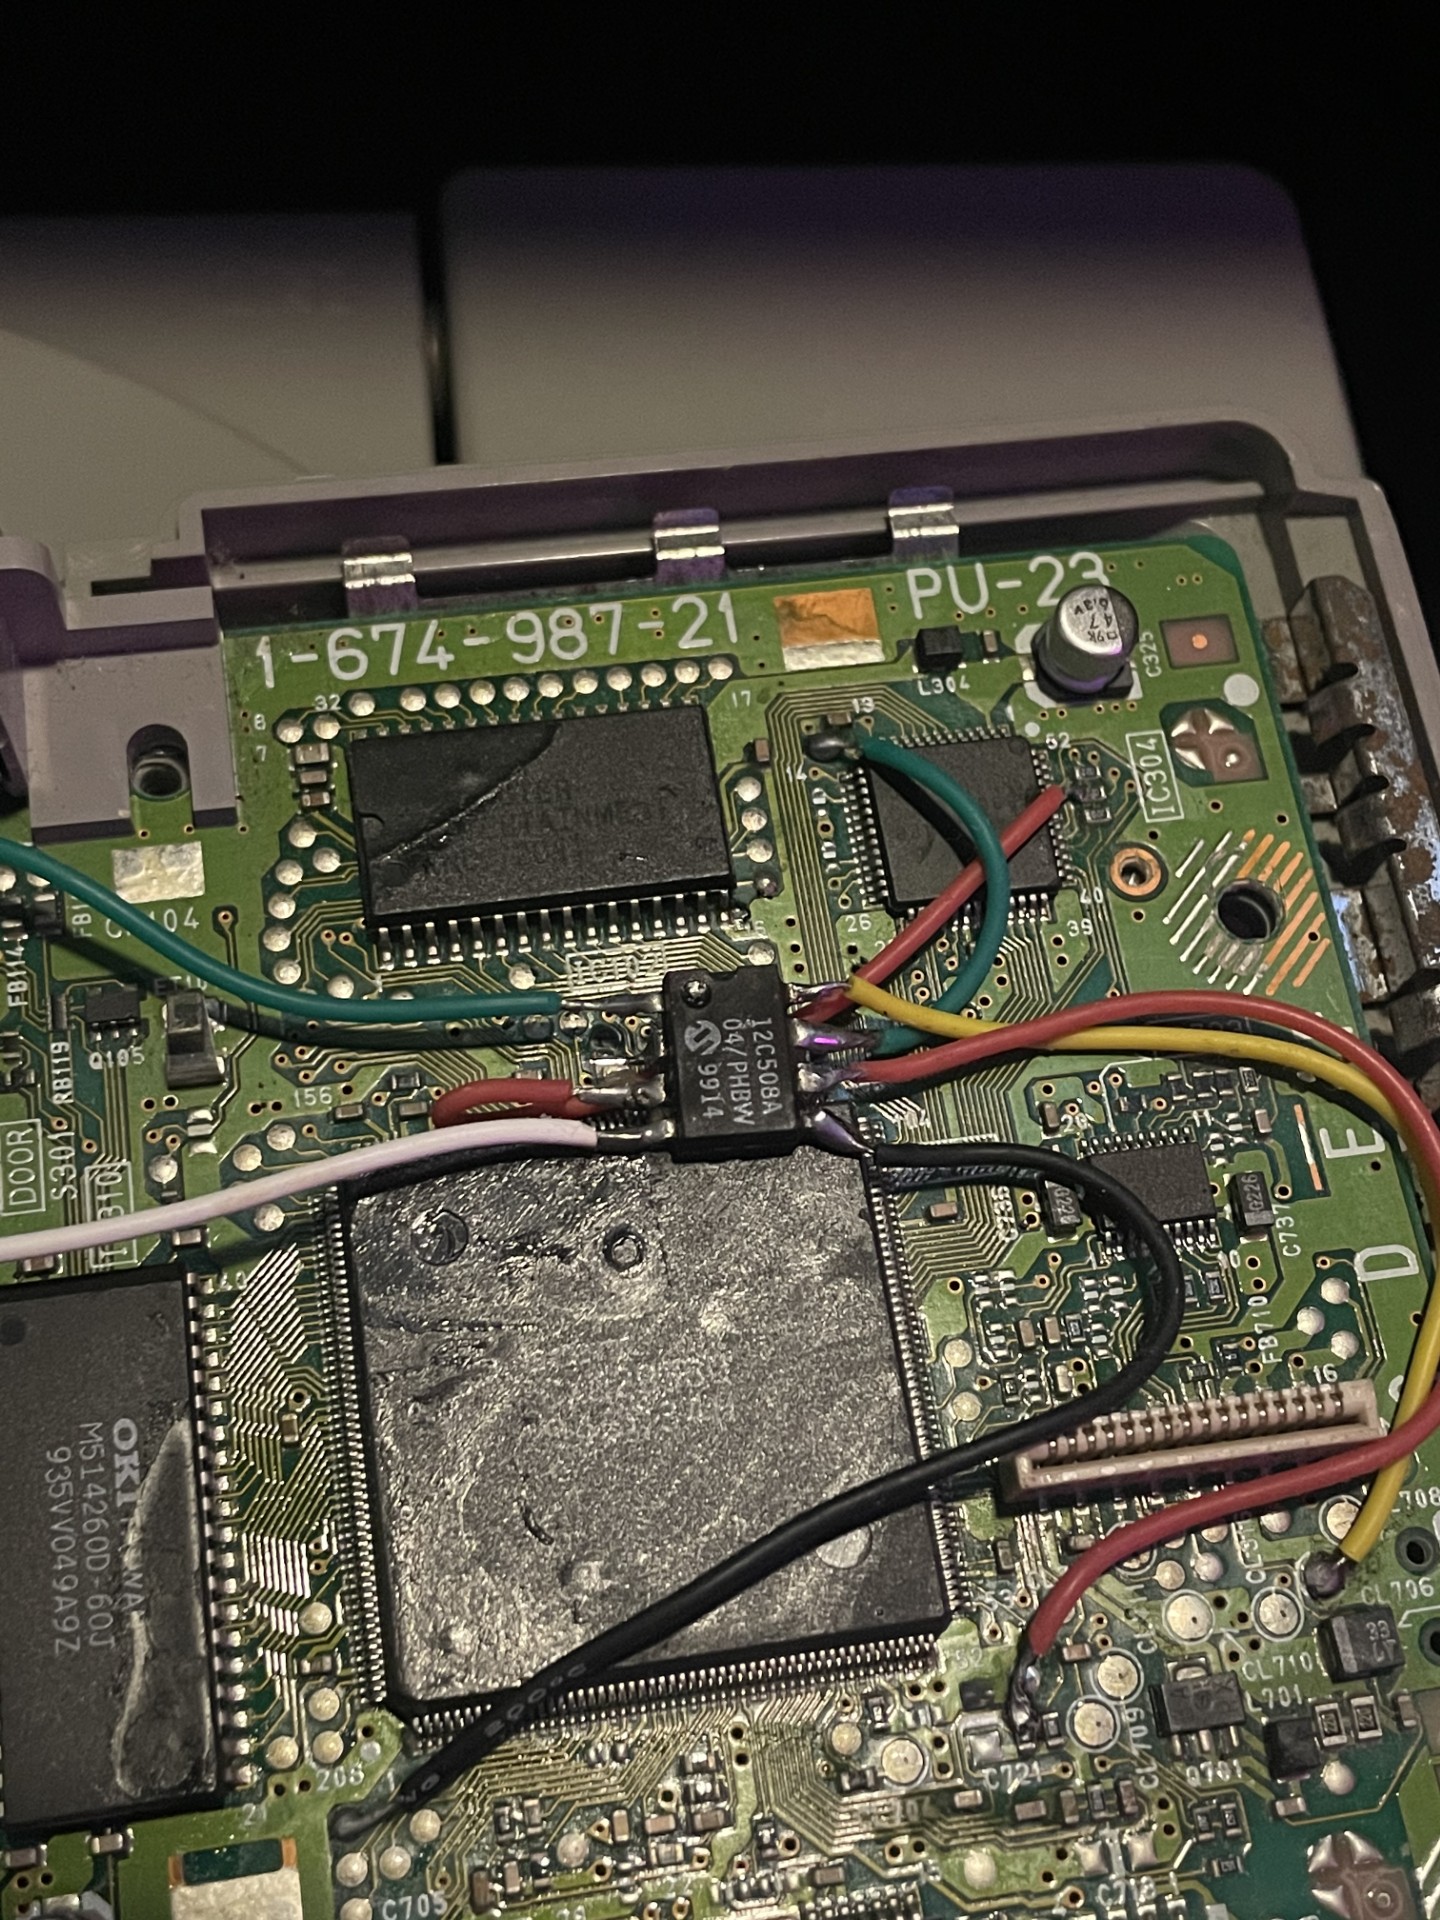
Soldered Modbo 5.0 to PlayStation 2. Identified safe alternative 3.3V pads and resolved Y-break wire routing issue. Completed the wiring thanks to William Quade guide's.
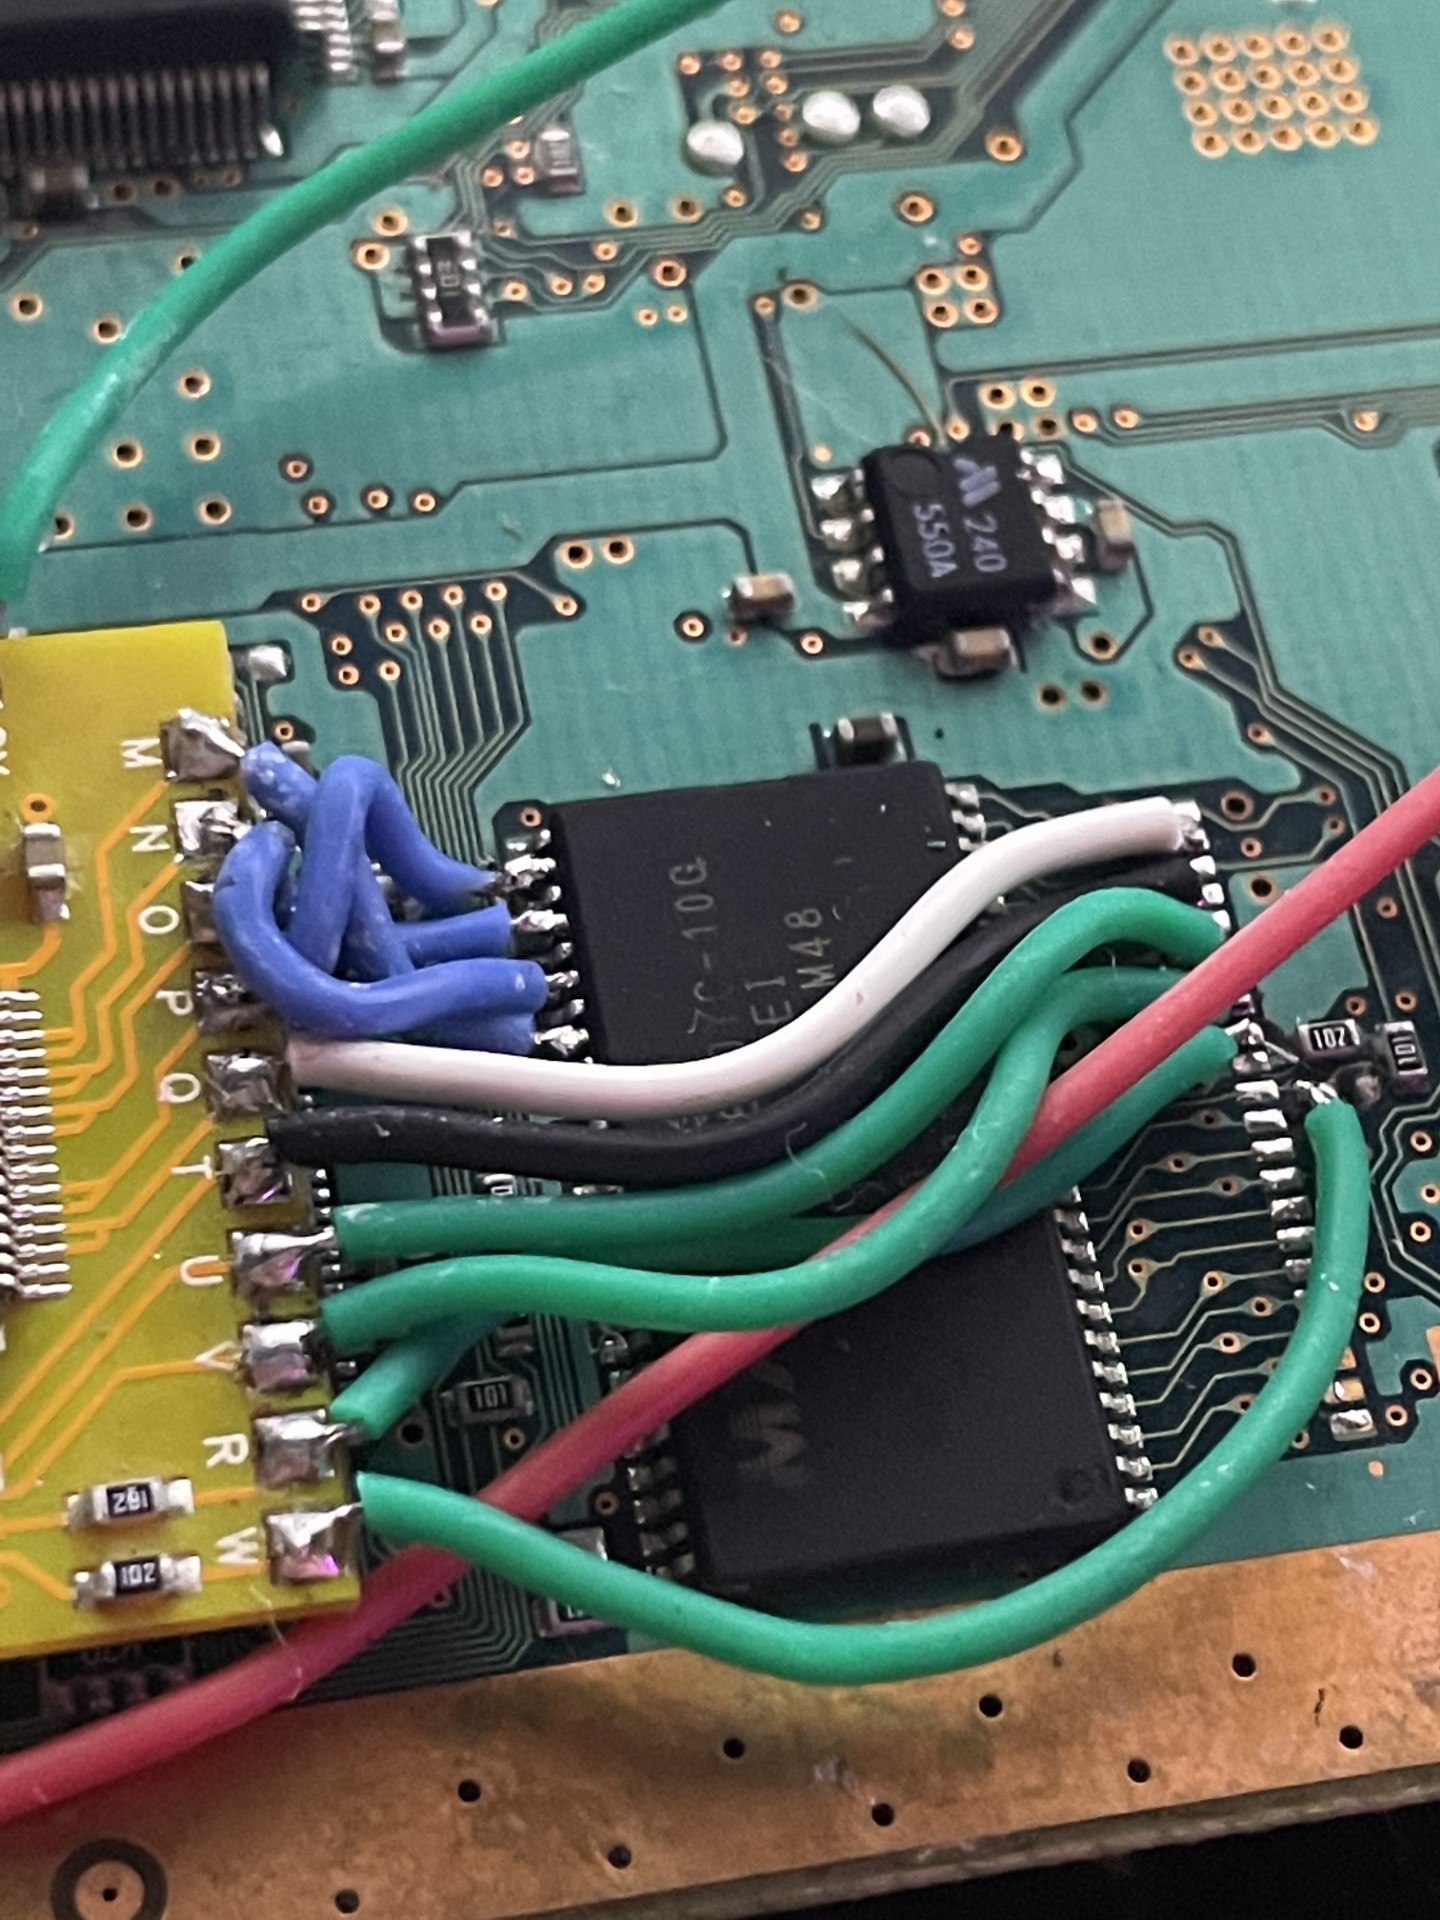
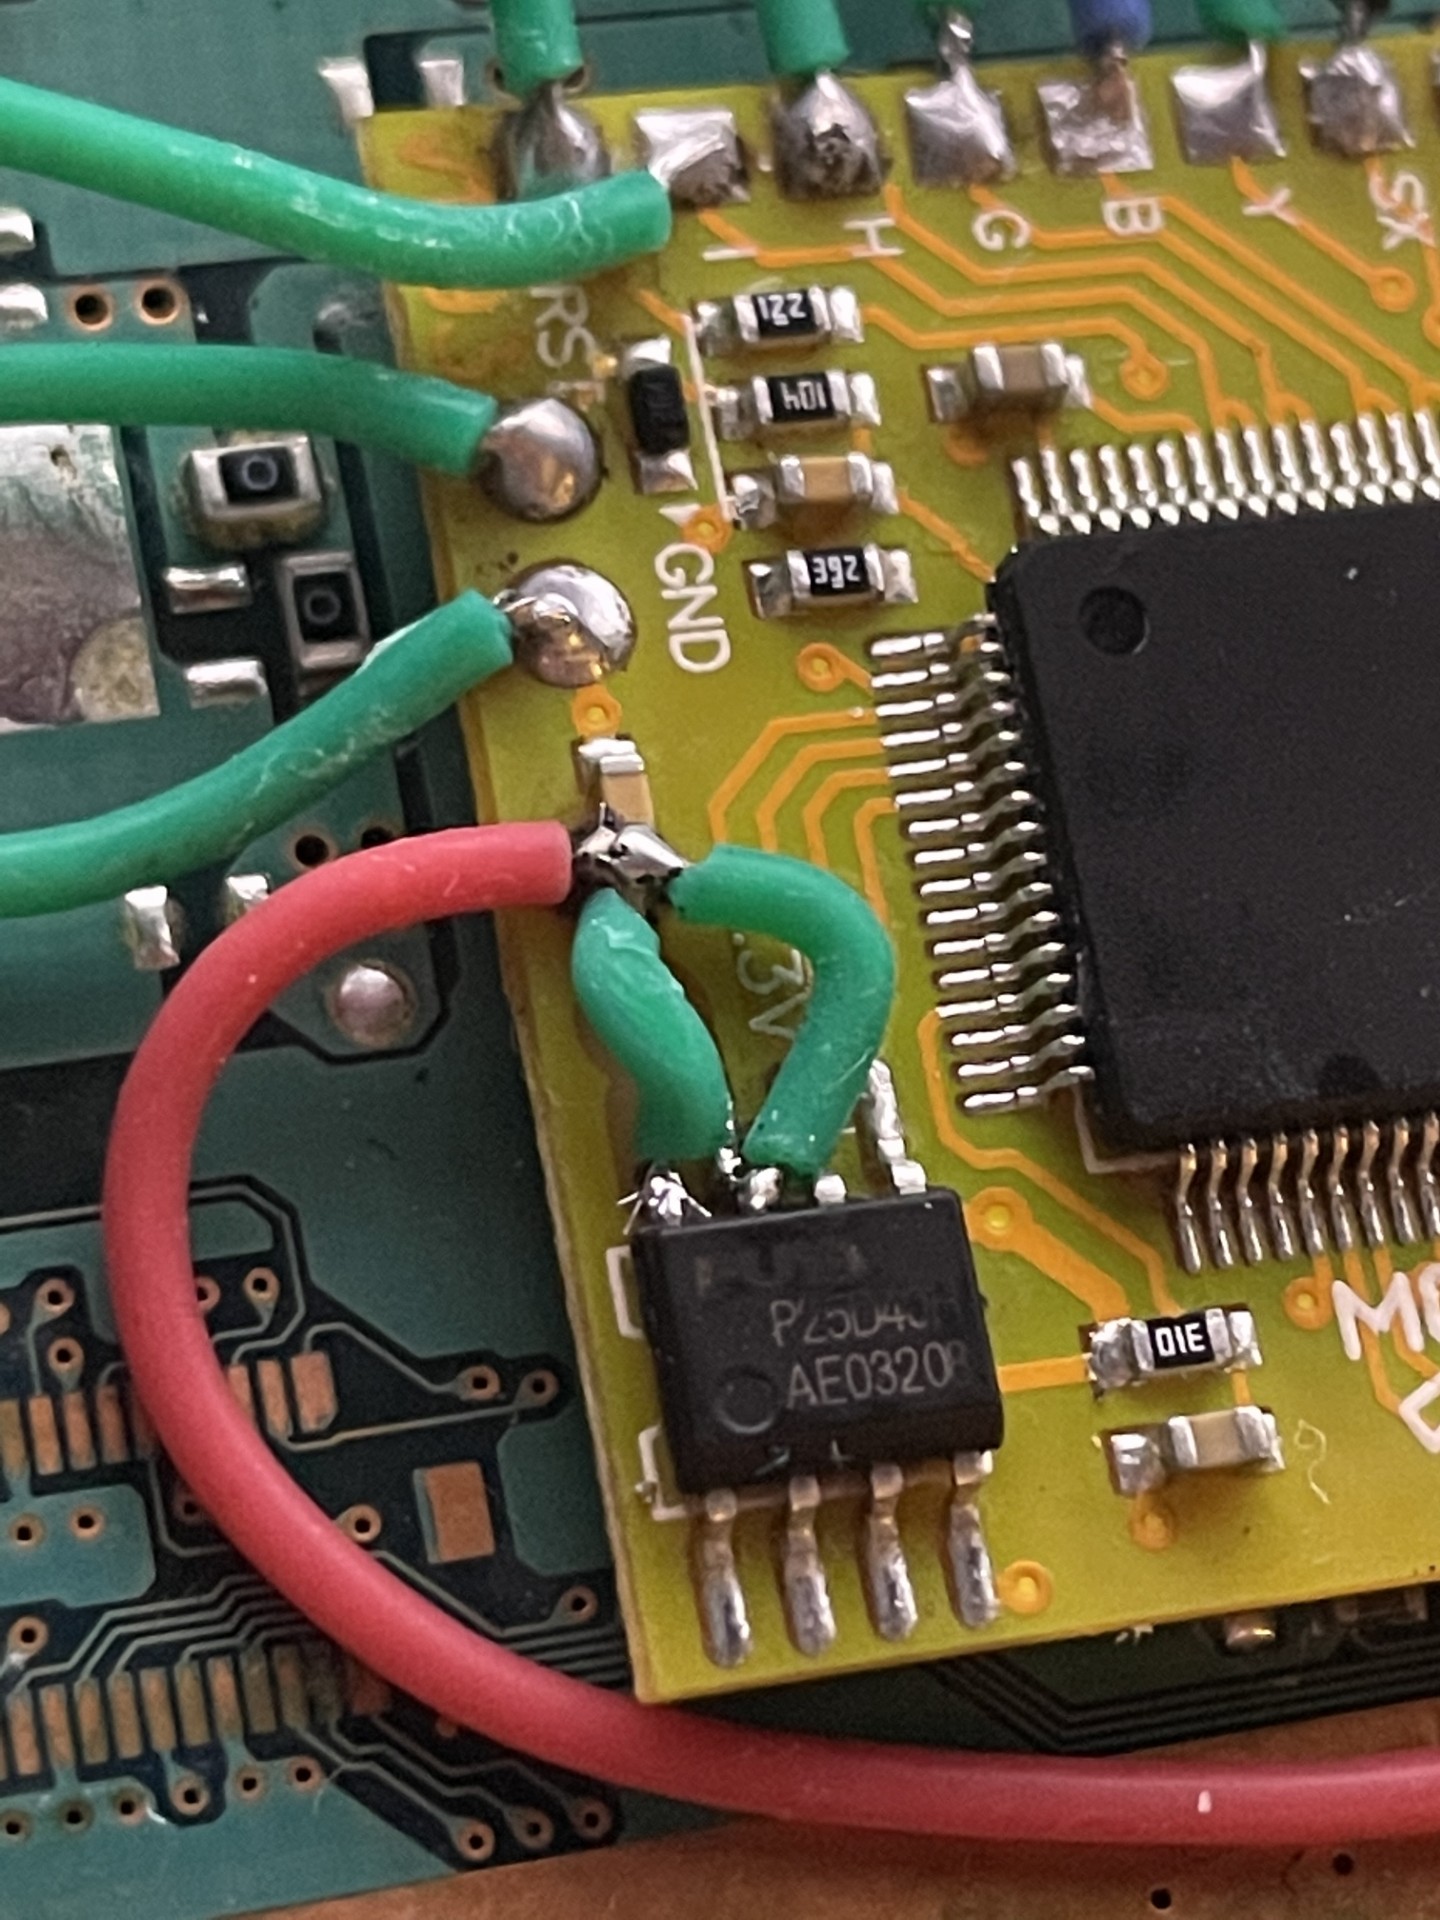
Found da PlayStation 1 at a flea market with a half-installed modchip. Completed the wiring using William Quade guide's via trial and error.
In-depth analysis covering teardown, component desoldering, measurement documentation, schematic reconstruction using AutoCAD, and insights into the design of flash storage devices. This project demonstrates practical application of reverse engineering principles, hardware diagnostics, and schematic replication. Very special Thank you to Professor Sonny Tutti who took the time to recover the full report I had lost.
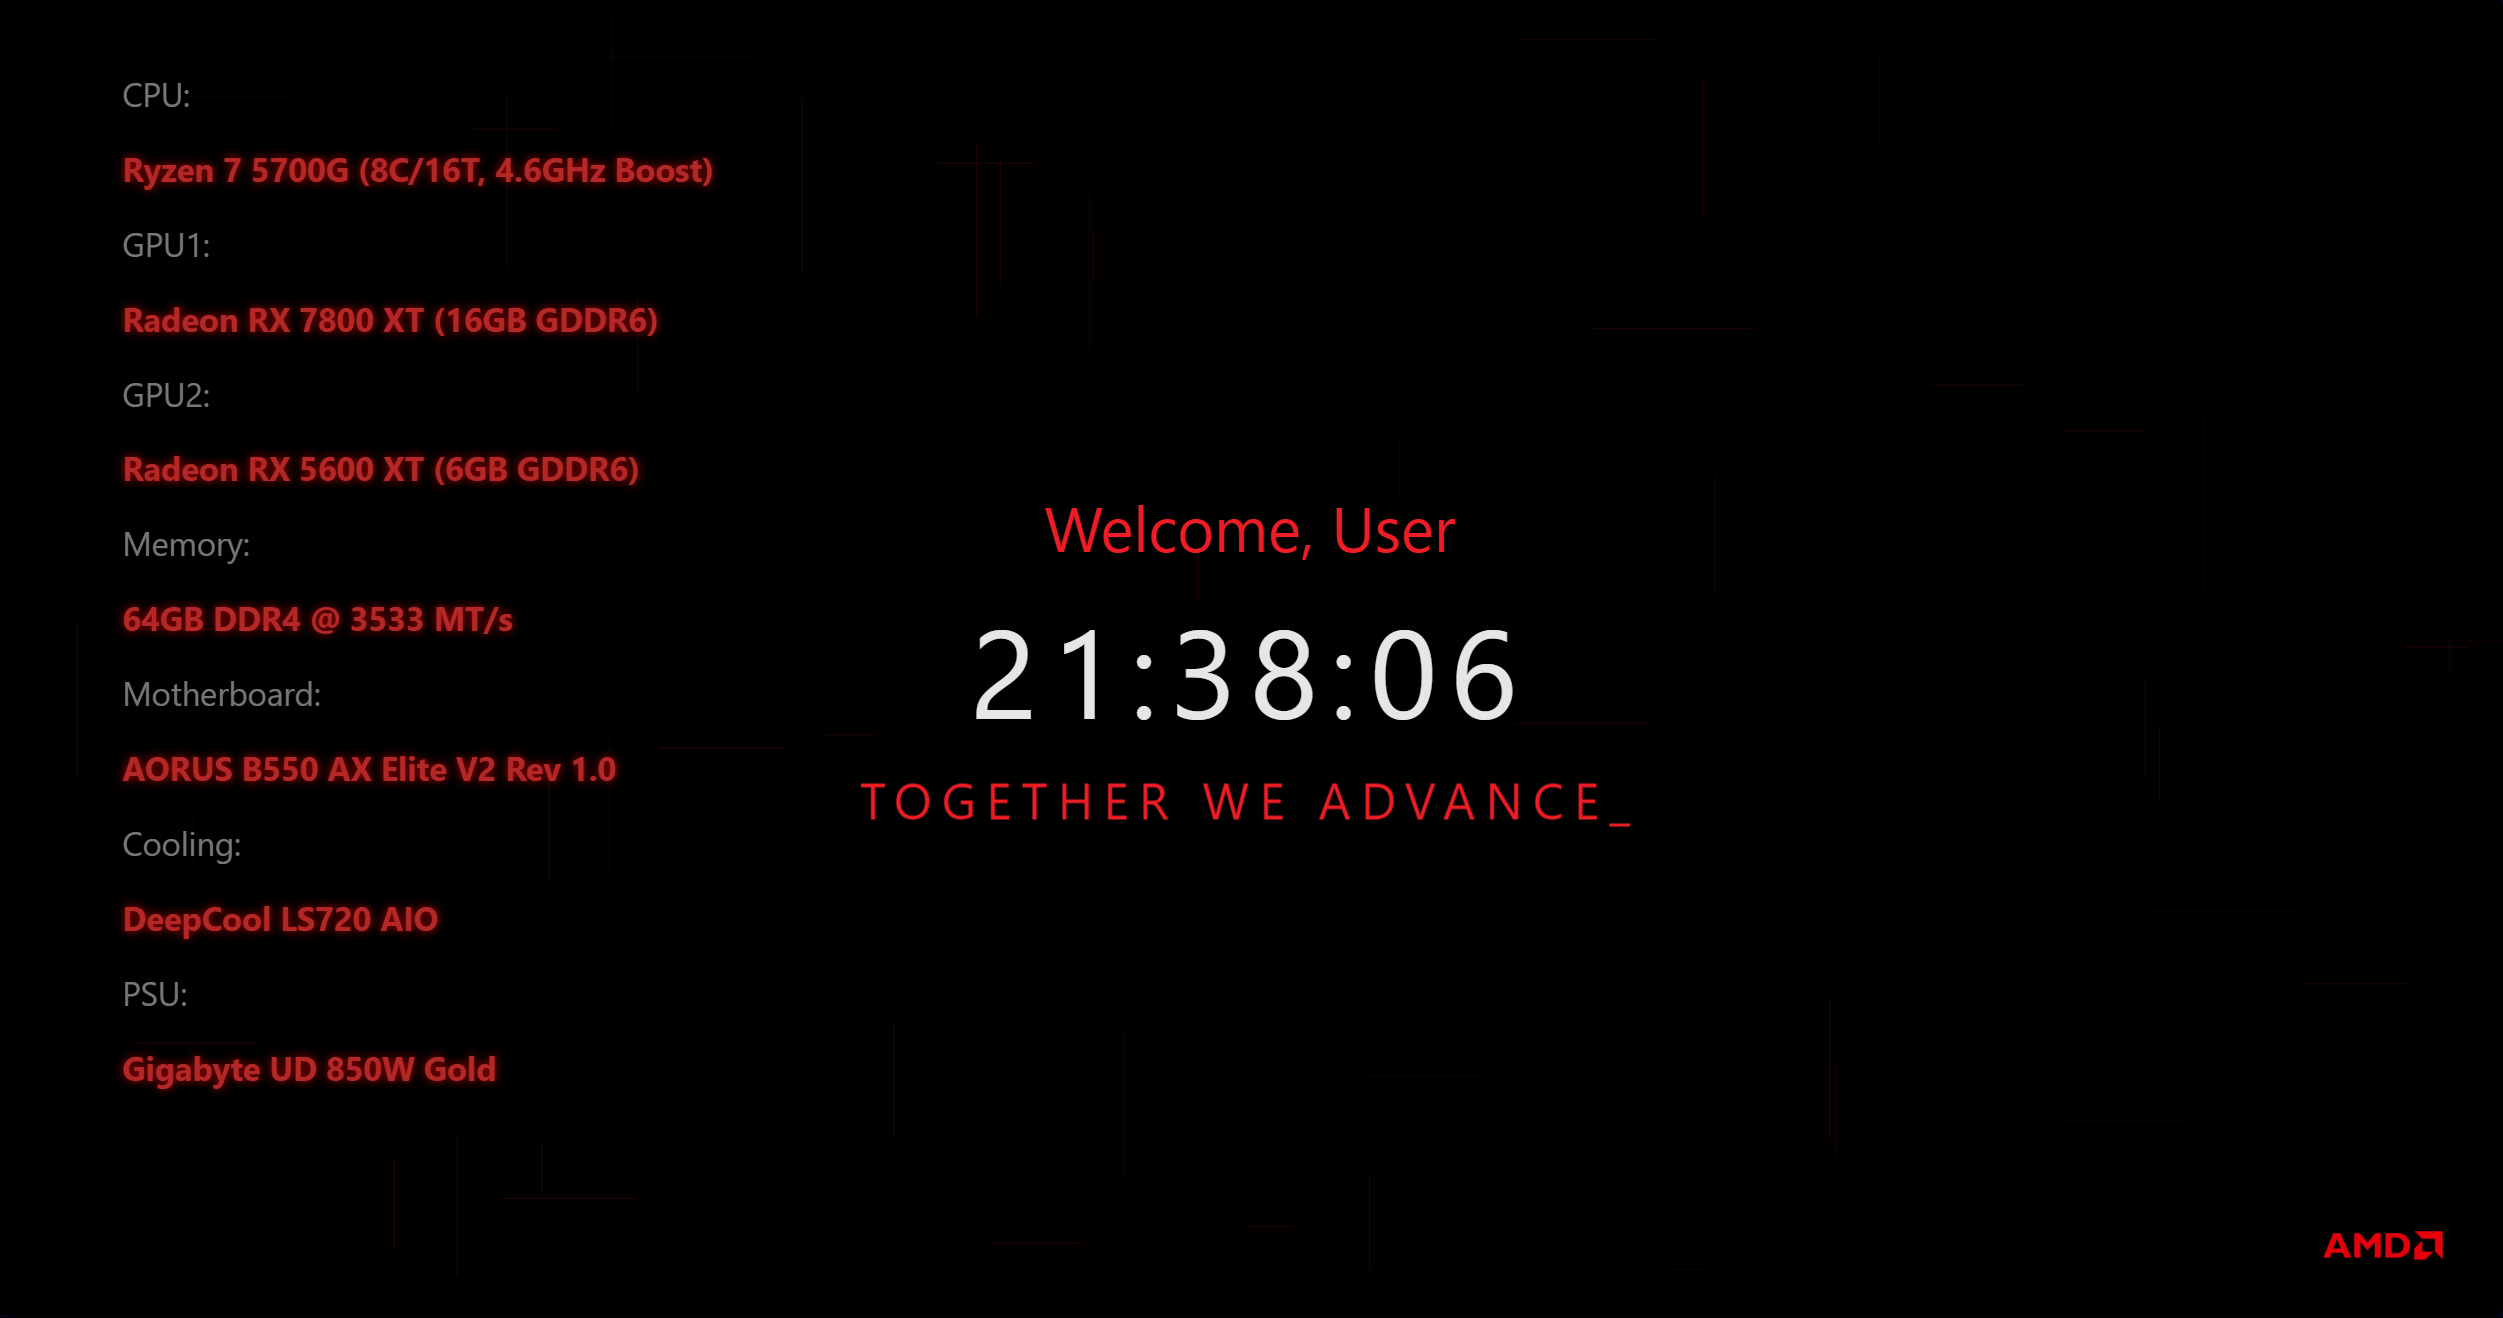
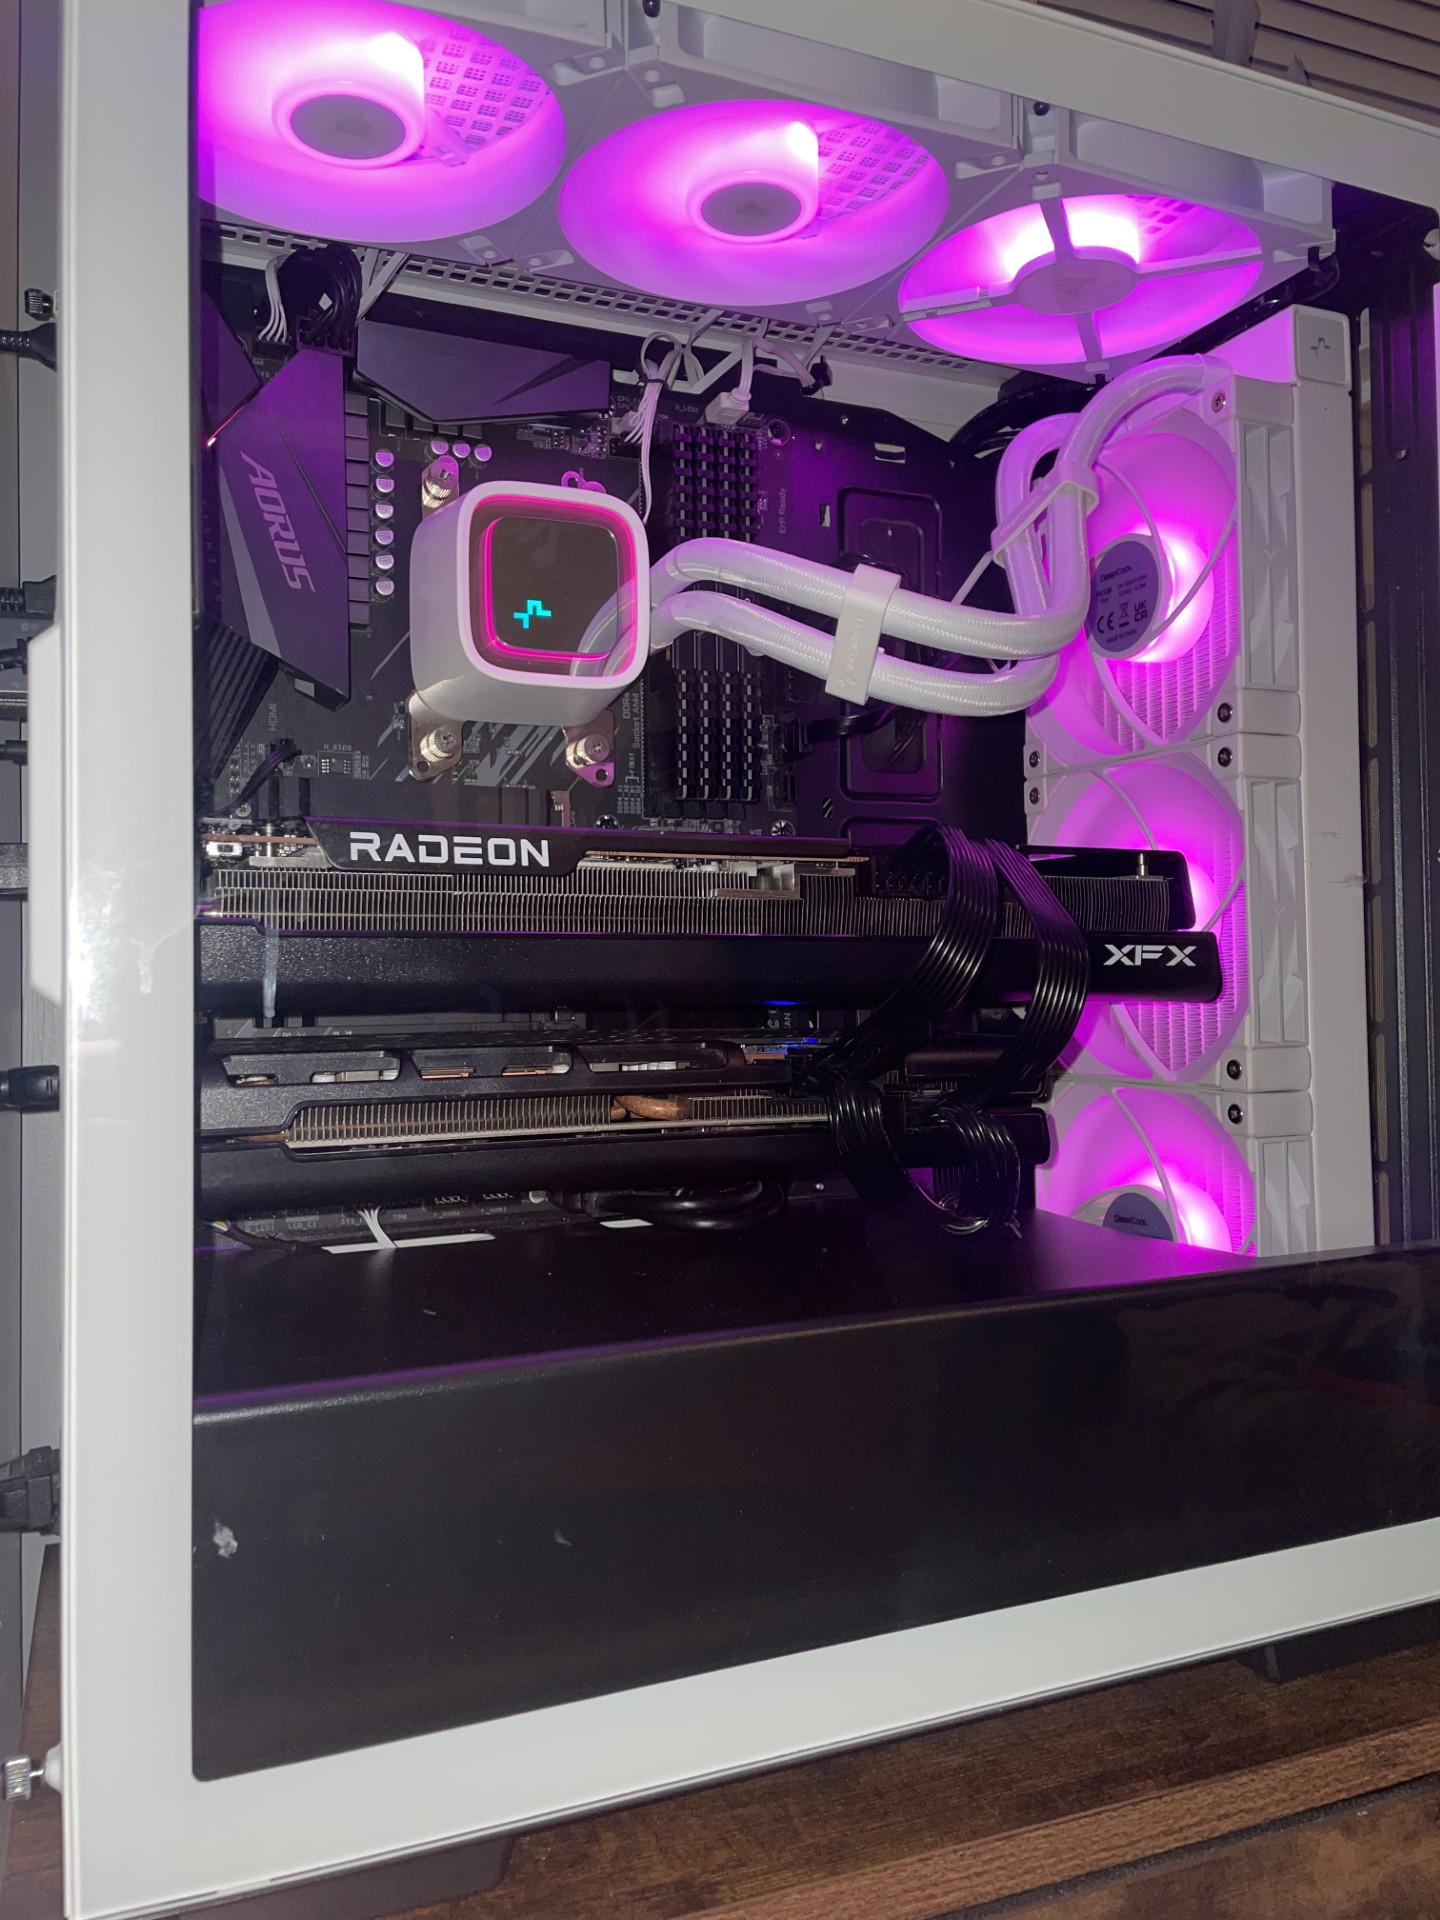
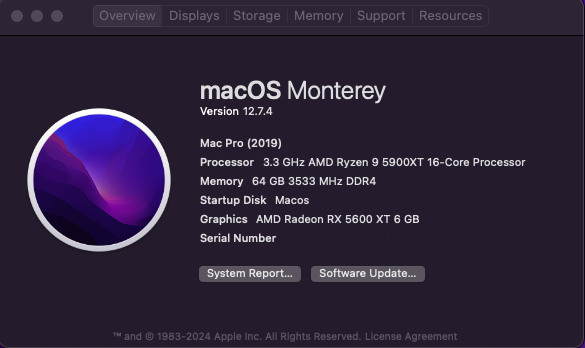
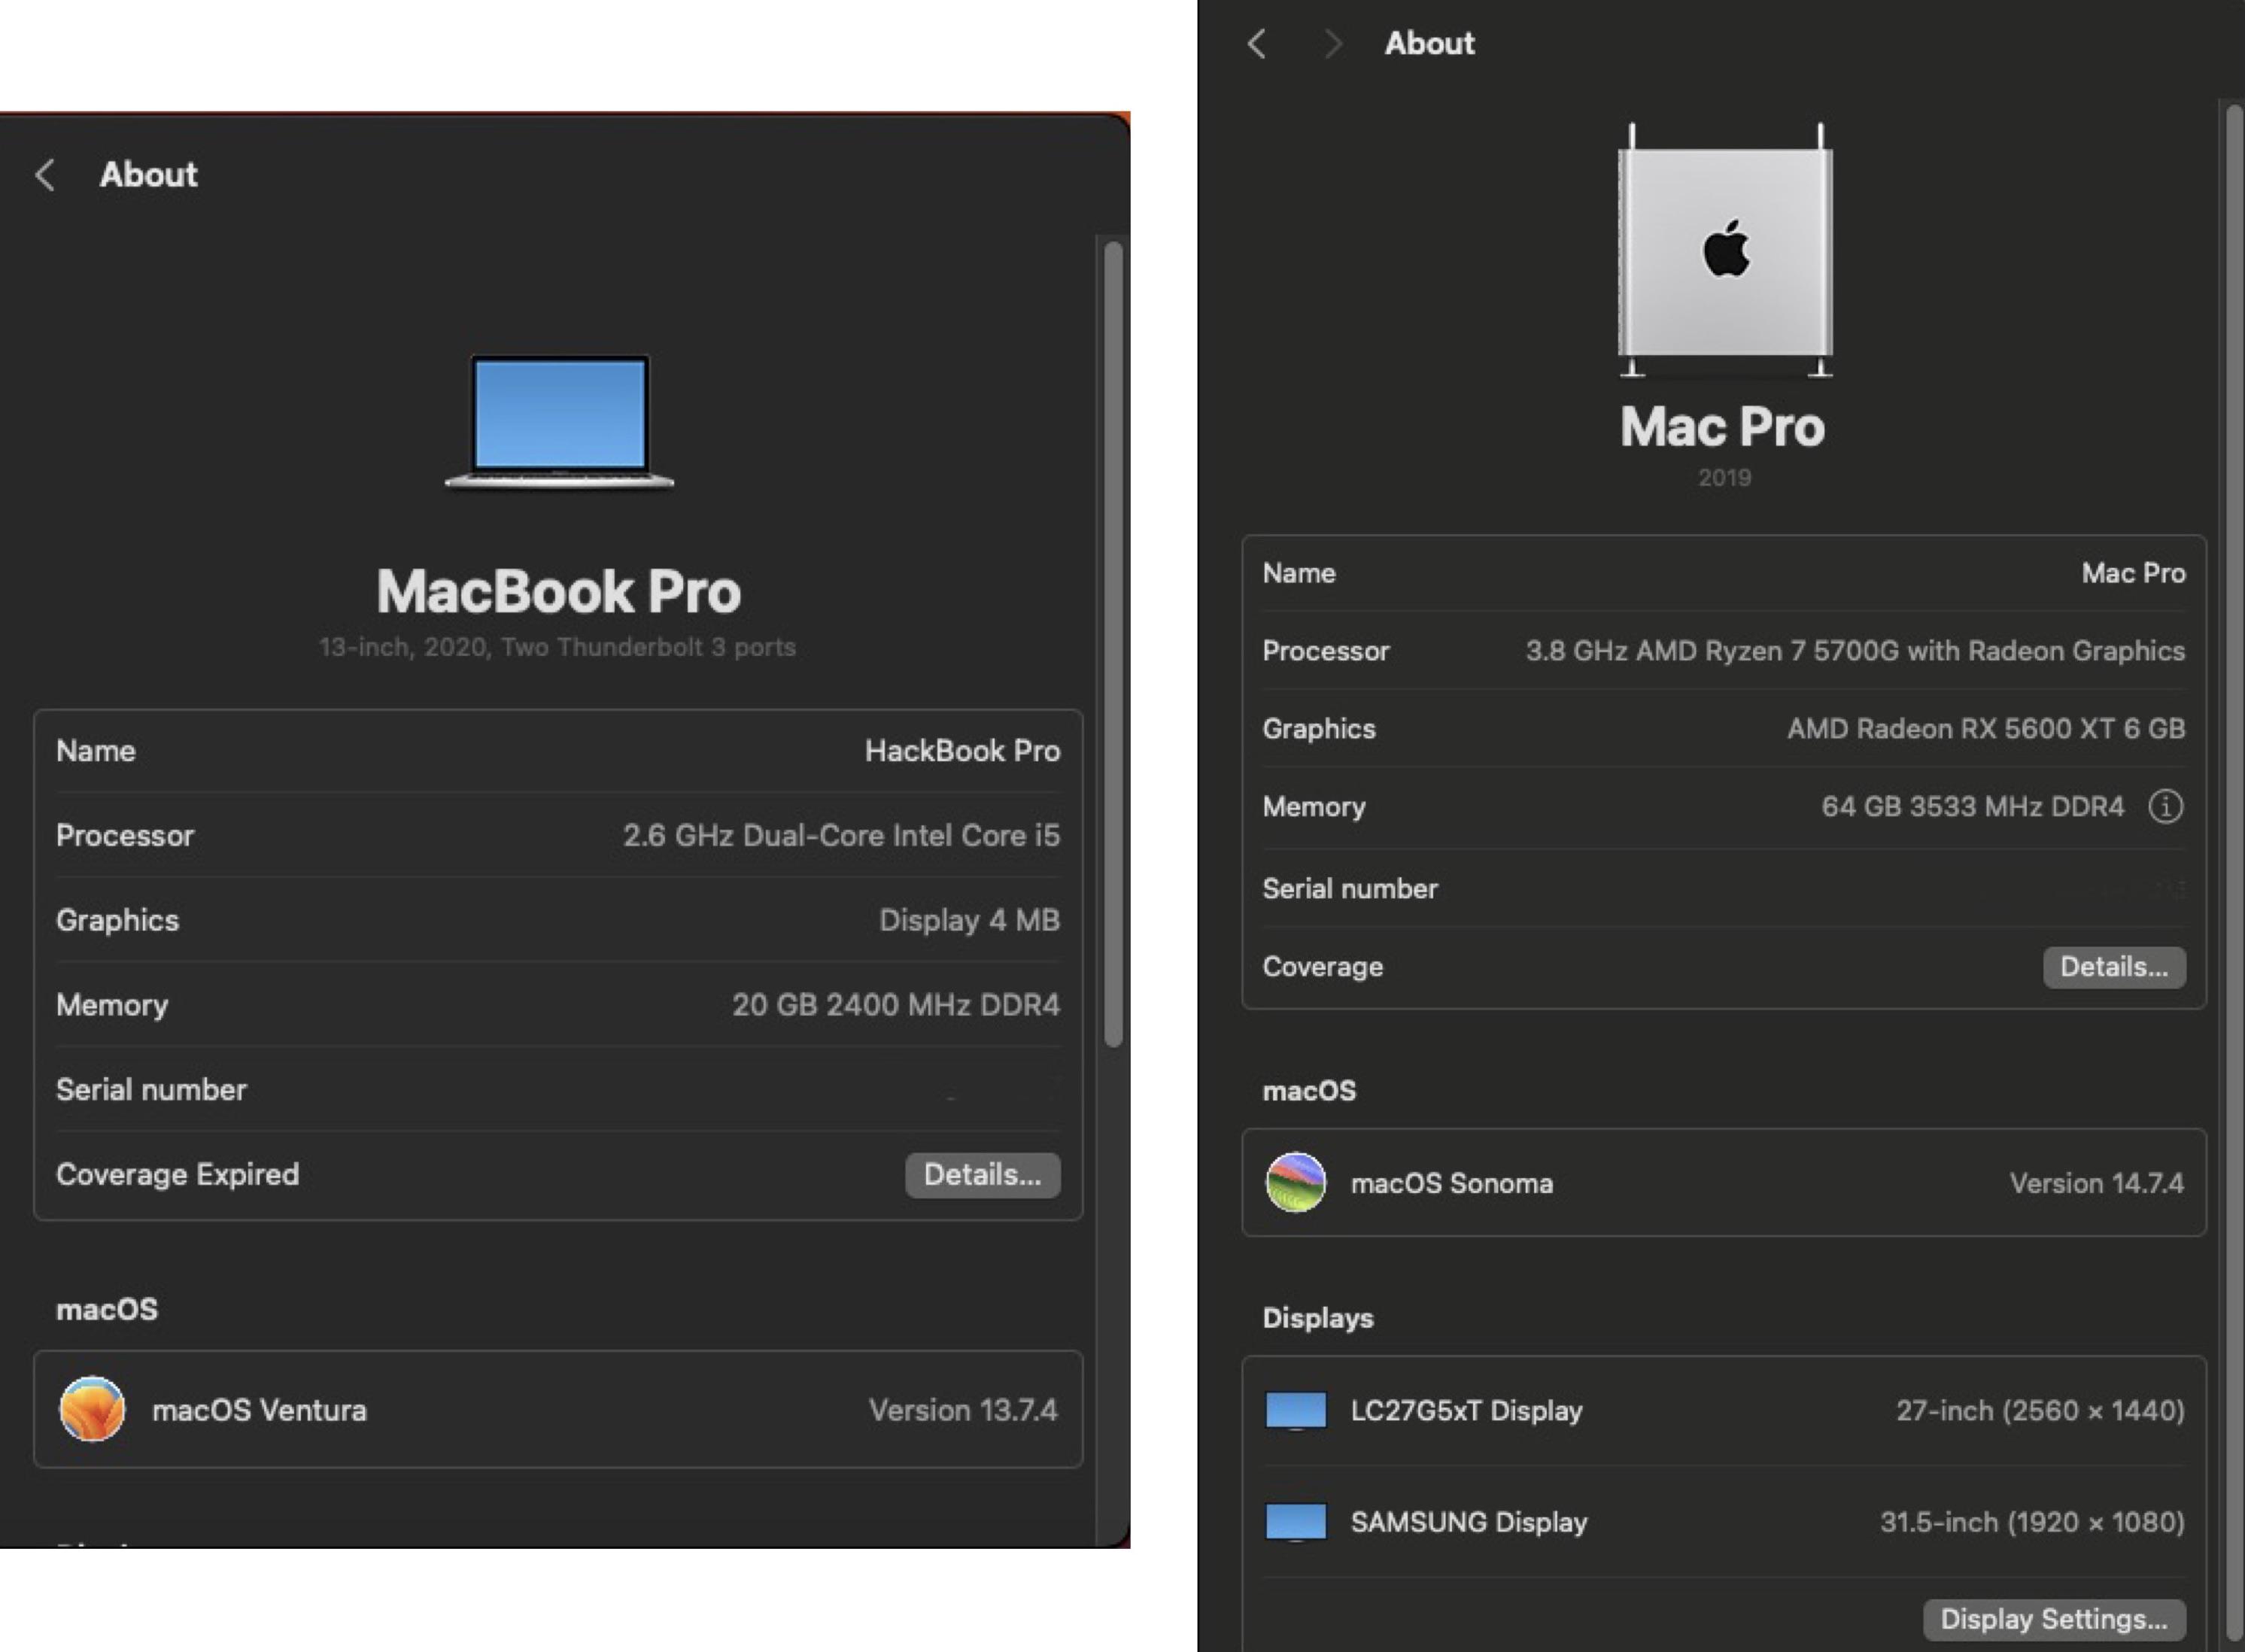
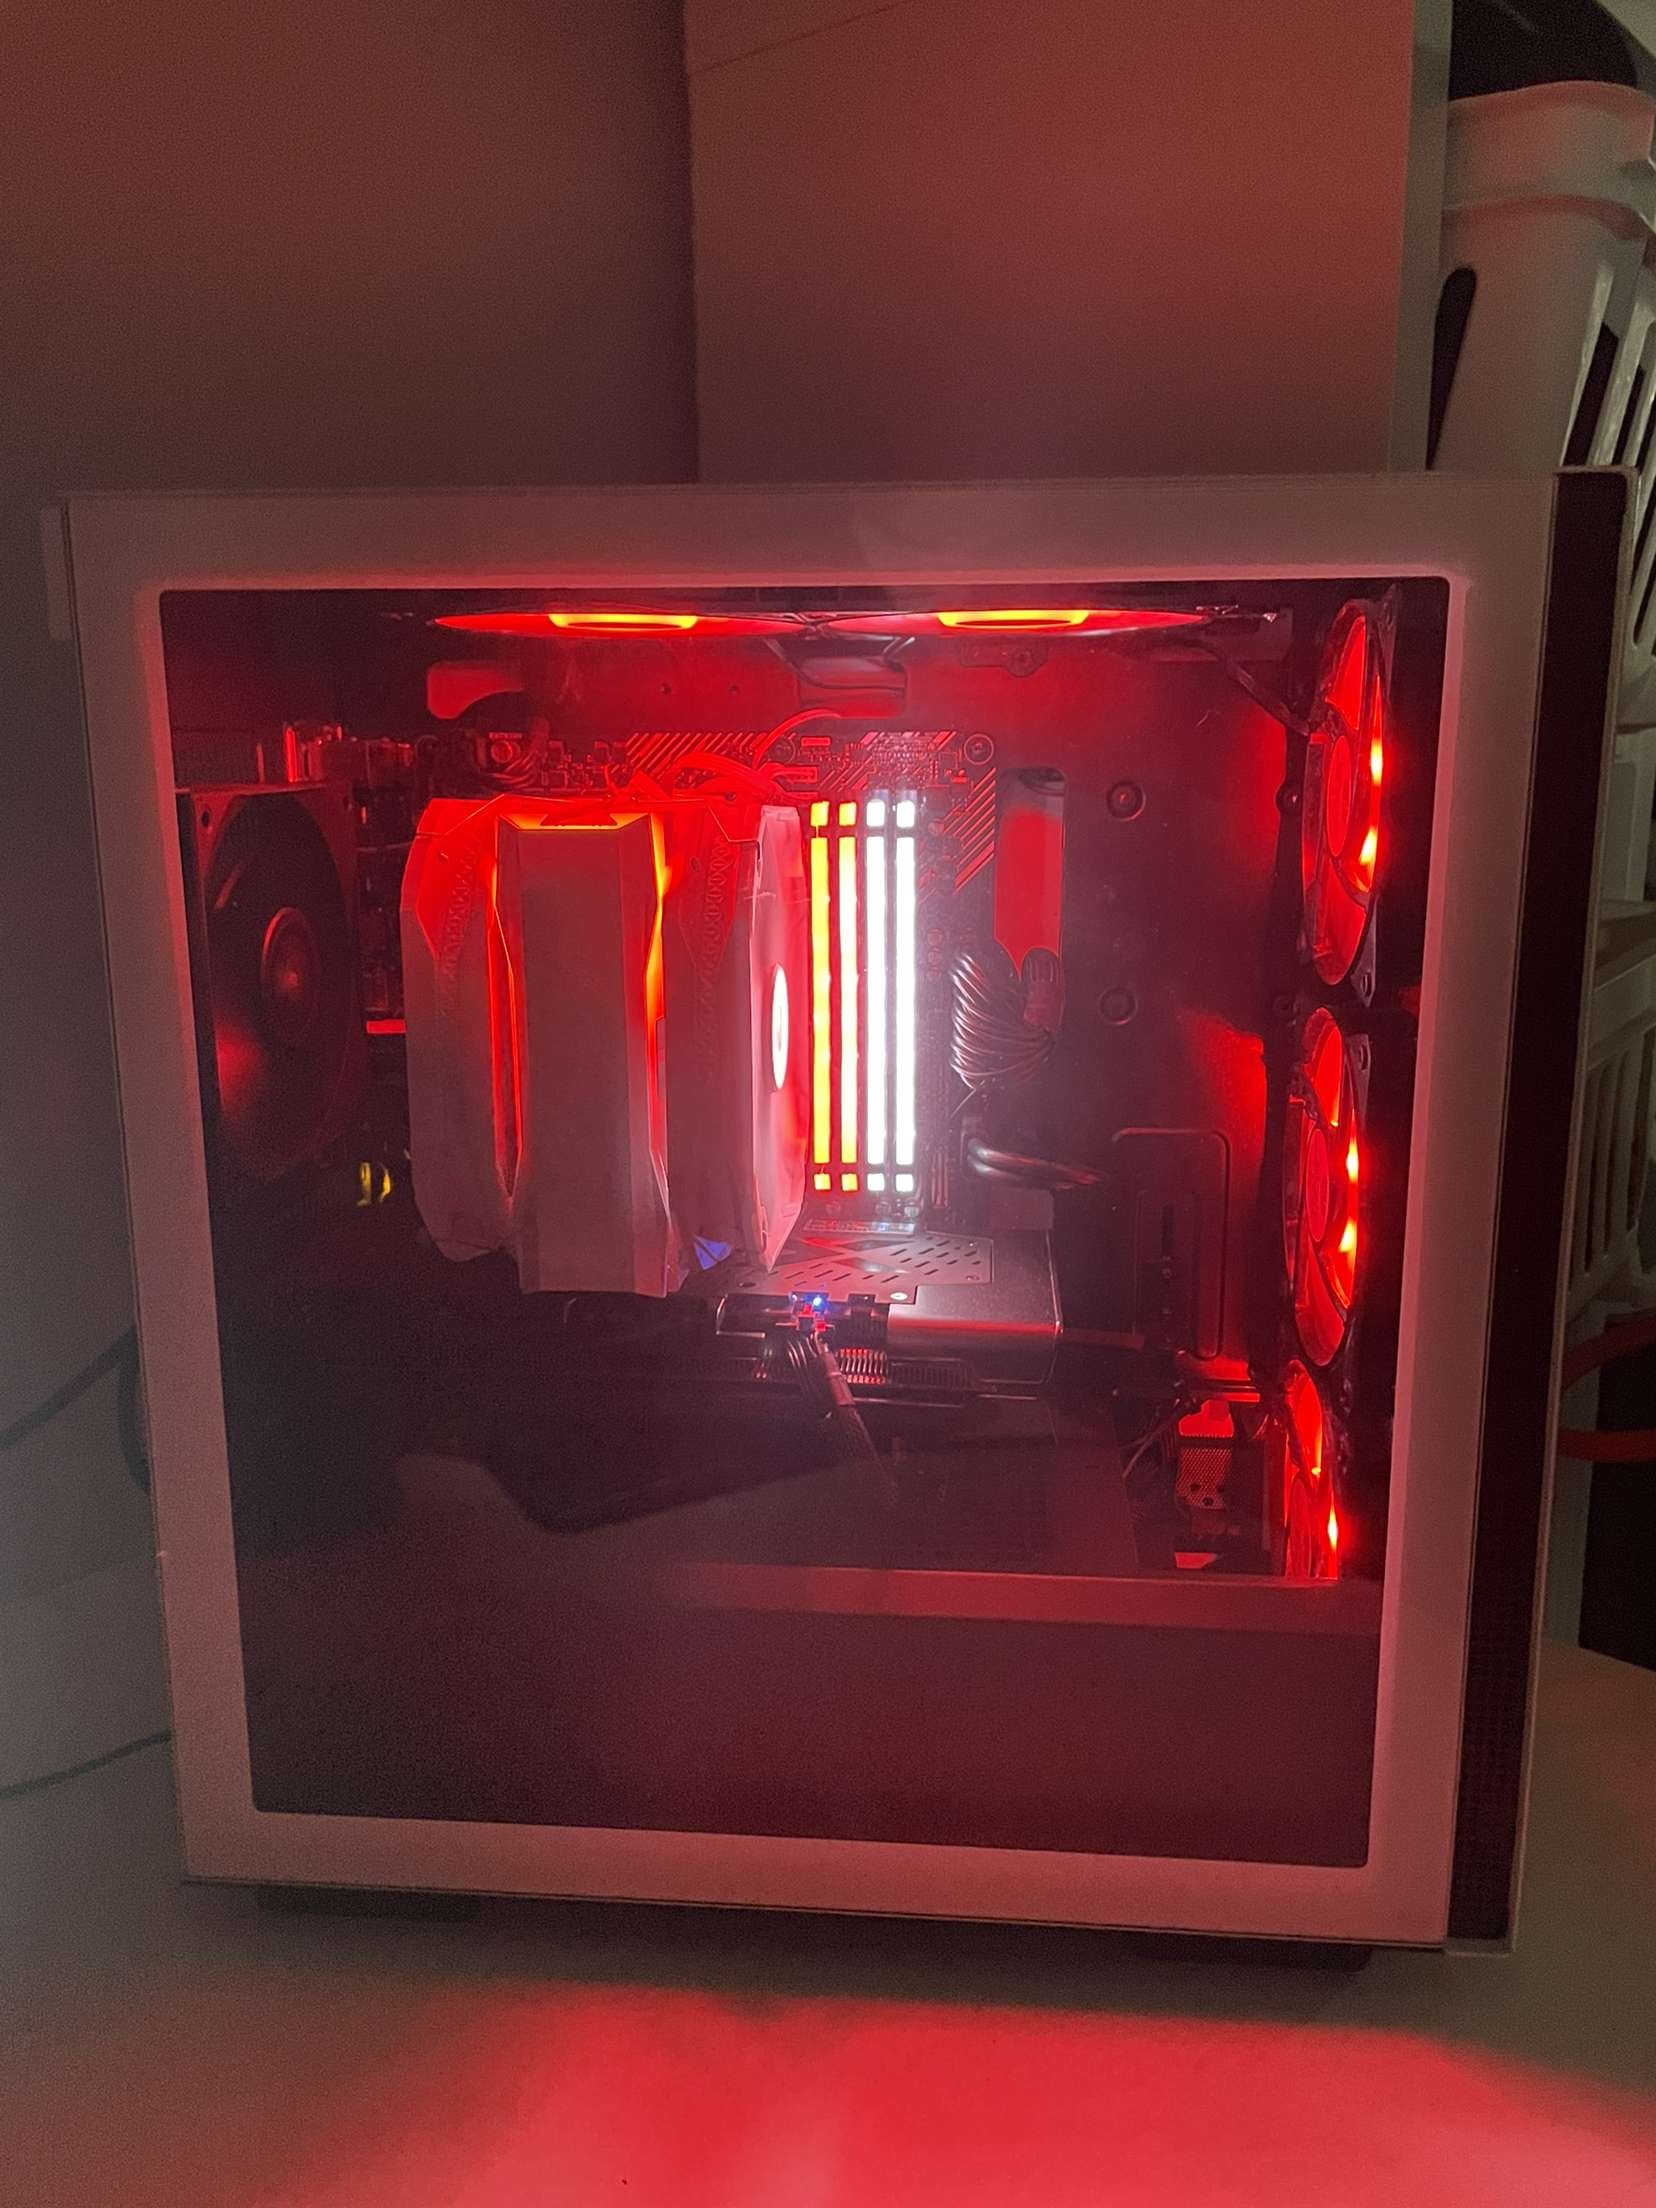
View Full Report (PDF)Built a macOS Monterey to Sonoma Hackintosh on Ryzen 9 5900XT (Previously R7 5700G) with an RX 5600 XT, Dual booting windows with the 7800XT. Configured OpenCore, USB ports(Mapping), and ACPI patches. The DeepCool CK500 officially supports only two top-mounted 120mm fans, but I managed to fit a third by using small zip ties as mounting points. There’s just enough clearance to make this work cleanly.
Installed macOS Ventura on an AMD Ryzen 3 3200U Based Asus VivoBook X512DA. Configured kexts, Wi-Fi, trackpad compatibility, and USB mapping.
Ryzen 7 5700G and Radeon RX 5600 XT configuration, focusing on clean airflow, red-themed RGB, and budget setup.
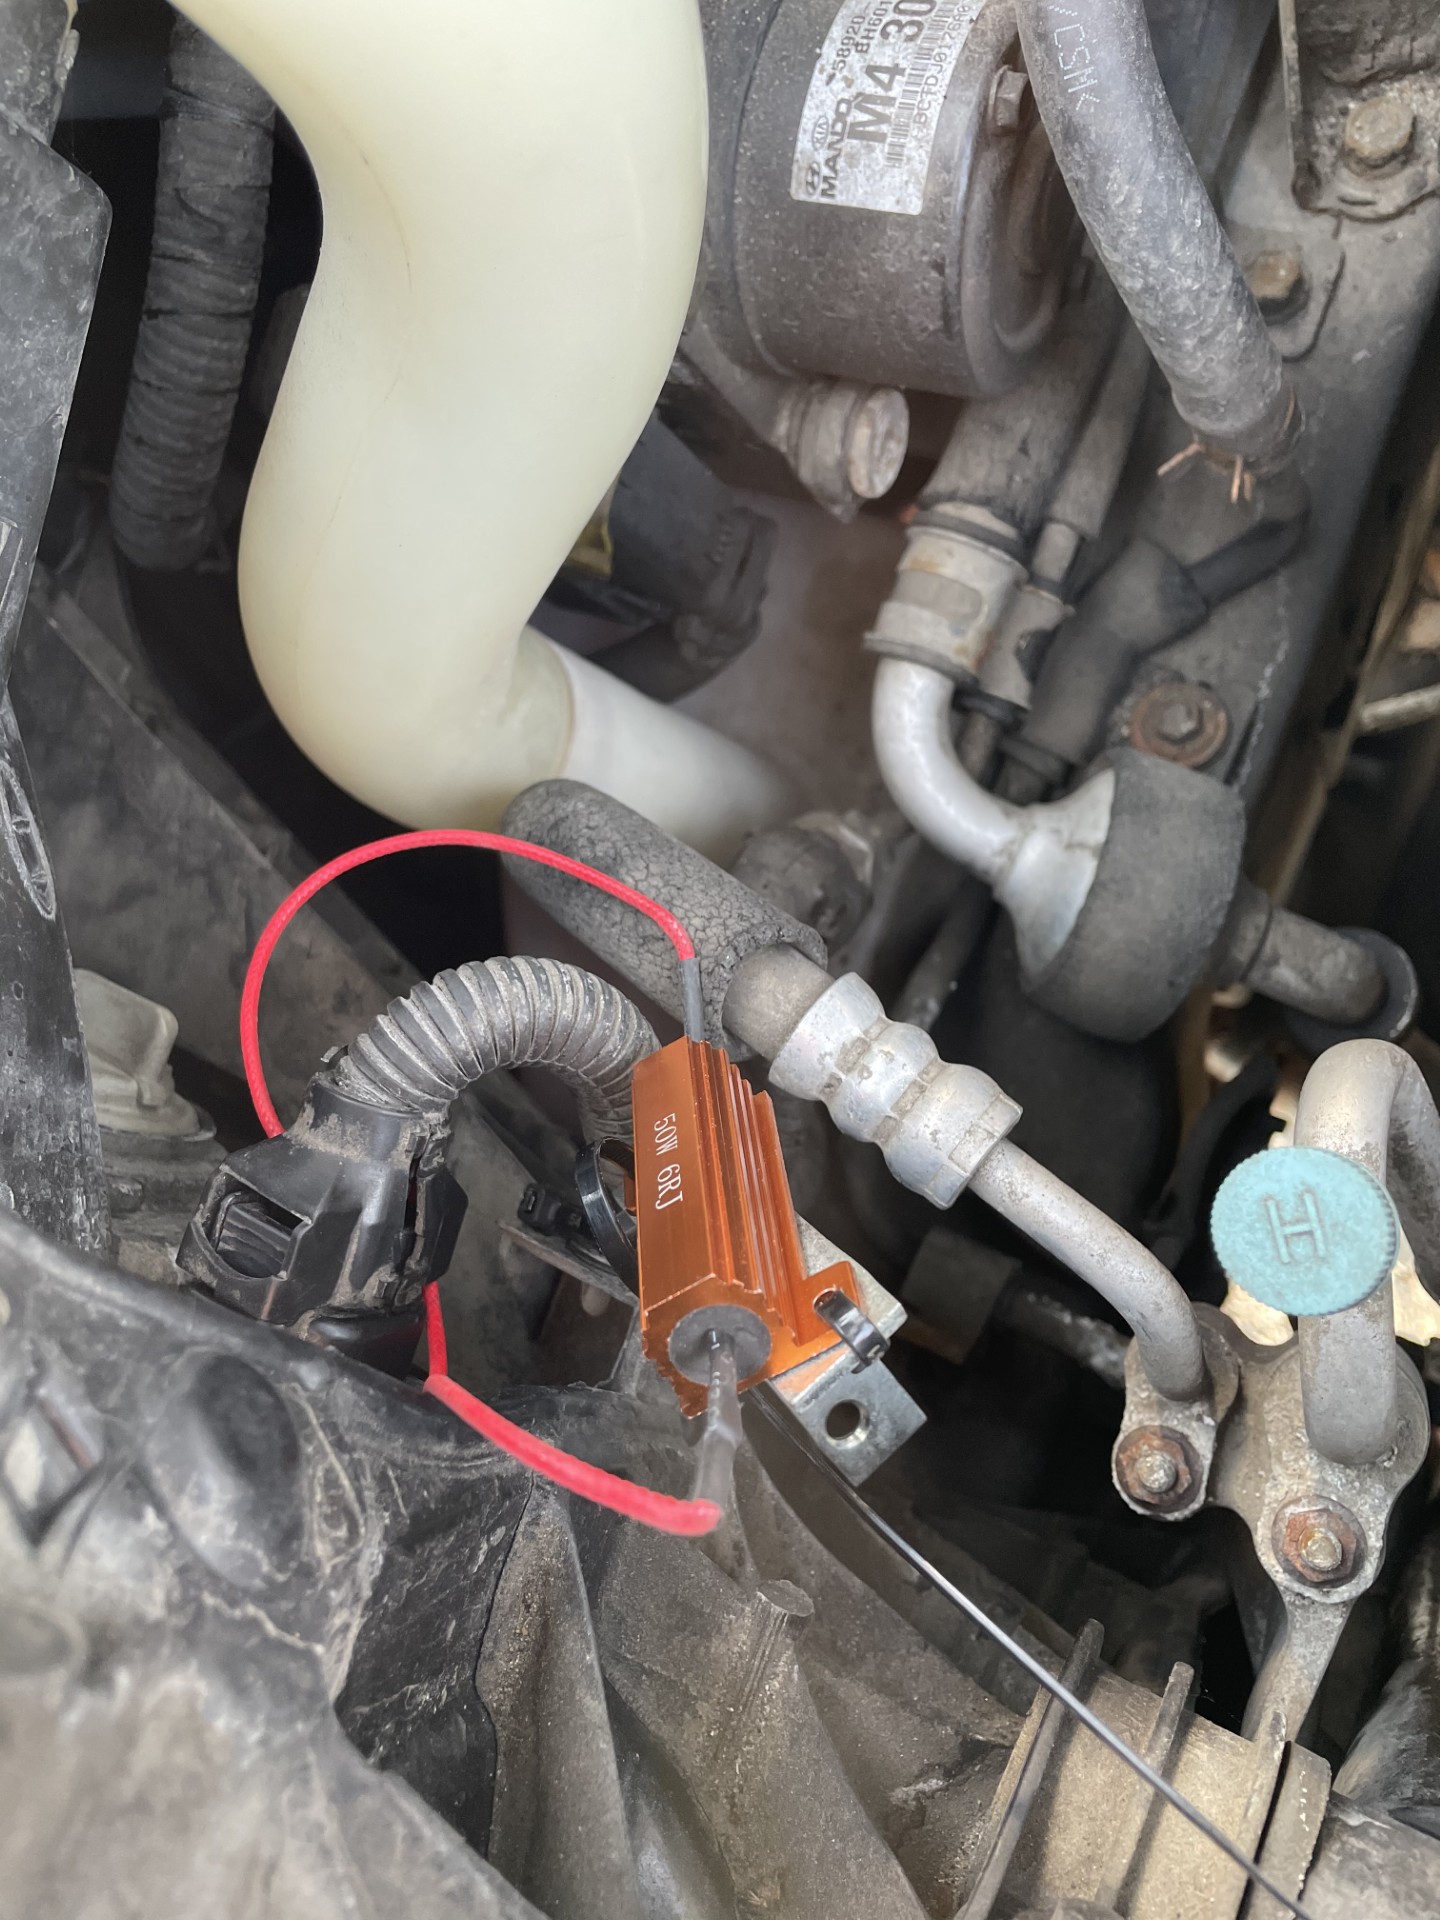
Soldered load resistors to stop hyperflashing after Halogen to LED Swap. Hyperflashing occurs when swapping in LEDs without resistors because LEDs use significantly less power and don't draw the same amount of current as halogen bulbs. This makes the car think a bulb has burned out, causing "hyperflashing." Resistors fix the issue by adding artificial load to the circuit, imitating the original bulb's current draw so the car’s flasher relay operates at normal speed. Most vehicles expect around 1.5A–2.5A per bulb, meaning you need a minimum 35W 6Ω resistor wired across each signal wire and ground (Thats 8 Solder/Crimp points). Though, 50W 6Ω (6RJ) resistors are the universal best option, because under a running engine voltage (14V), the math is: 14V ÷ 6Ω = 2.33A 14V × 2.33A = 32.6W With a 50W resistor, only about 65% of its rated capacity is used, this is a safe margin for heat and long-term use.
I enjoy hardware modding, reverse engineering, iOS tweak development, and all kinds of custom projects. With a passion for understanding how things work behind the scenes, I combine hands-on work with modern principles. My goal is to explore technology in a way I enjoy — creating, learning, and improving every step of the way. Whether it’s developing new features for my phone, understanding technology so I can fix rather than replace, adding mod chips for freedom on consoles, or working on DIY projects, I’m driven by need for technical independence.